


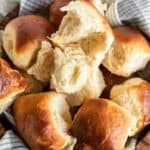

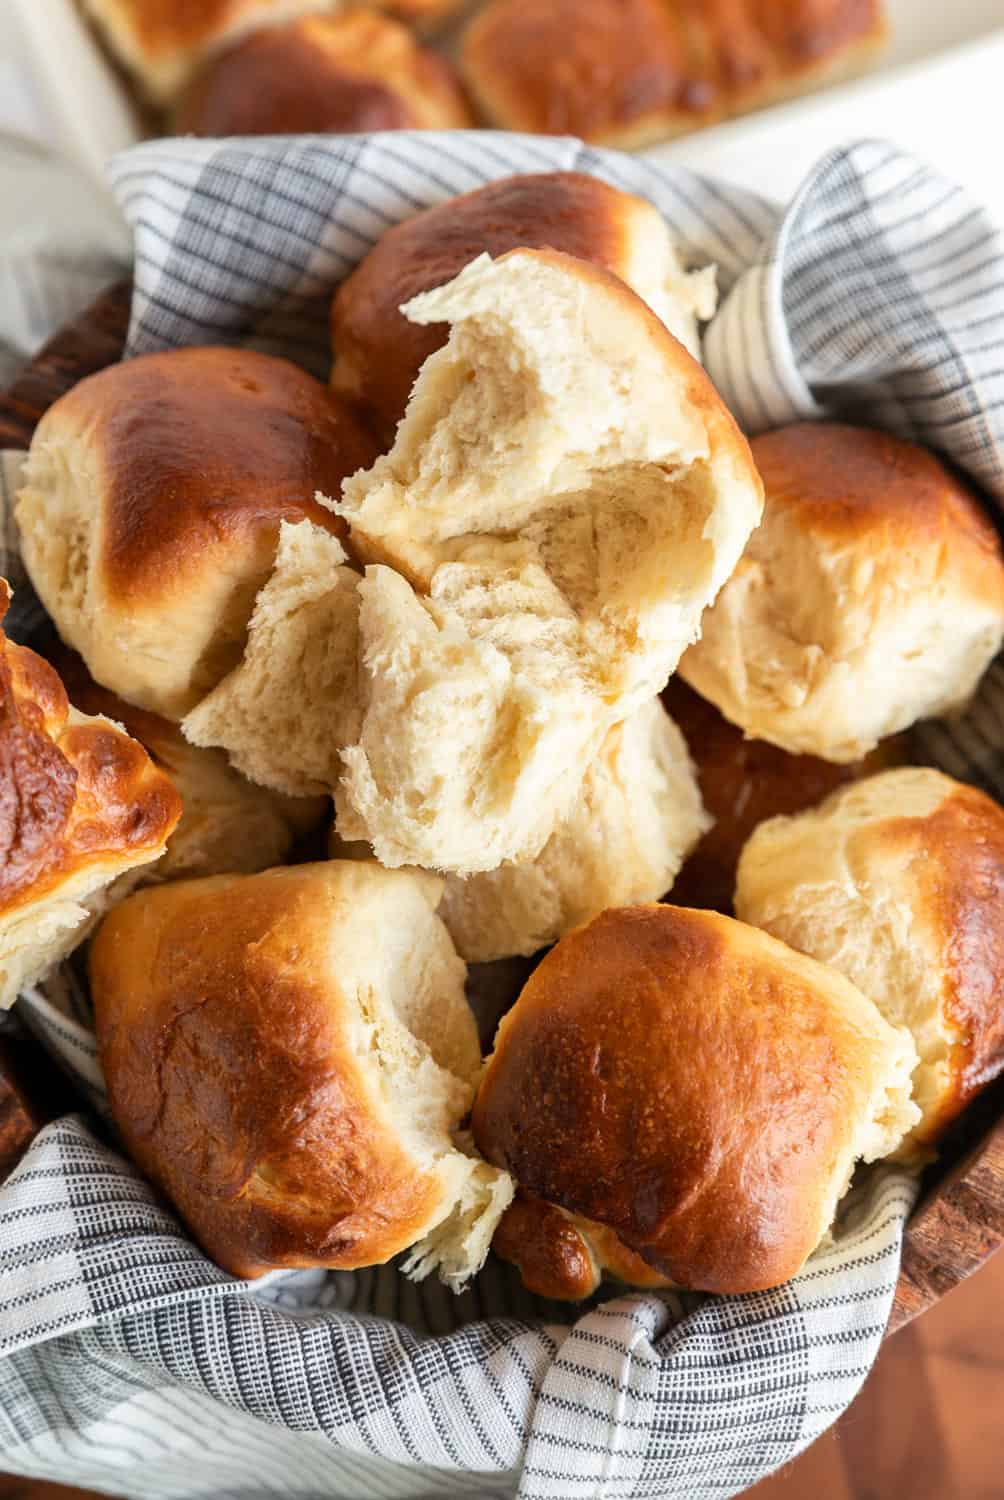
These soft, buttery, golden-brown, Hawaiian Sweet Rolls are "close-your-eyes-and-smile" delicious. They're light and fluffy, slightly sweet, and they have the perfect, ultra-pillowy texture that I prefer in any roll. I've been making this recipe A LOT lately, more than I care to admit actually. I decided to update it with some tips and tricks to really ensure you get the perfect results.
Tips for Making Hawaiian Sweet Rolls
- It's flour flexible. I've tested this recipe with all purpose flour, bread flour, and a blend of both, and I can honestly say that they all came out delicious! Use whatever flour you have handy.
- This is a double proof recipe. Make sure that you allow your dough adequate time to proof, but also don't over-proof it. My first proof was for one hour, but the second proof was between one hour and fifteen minutes and 90 minutes.
- When making the dough, cream the butter, eggs, and sugar together first. Add the pineapple juice and balance of ingredients after that. Creaming the butter, eggs, and sugar will minimize the potential for the butter to start clumping when you add more liquid.
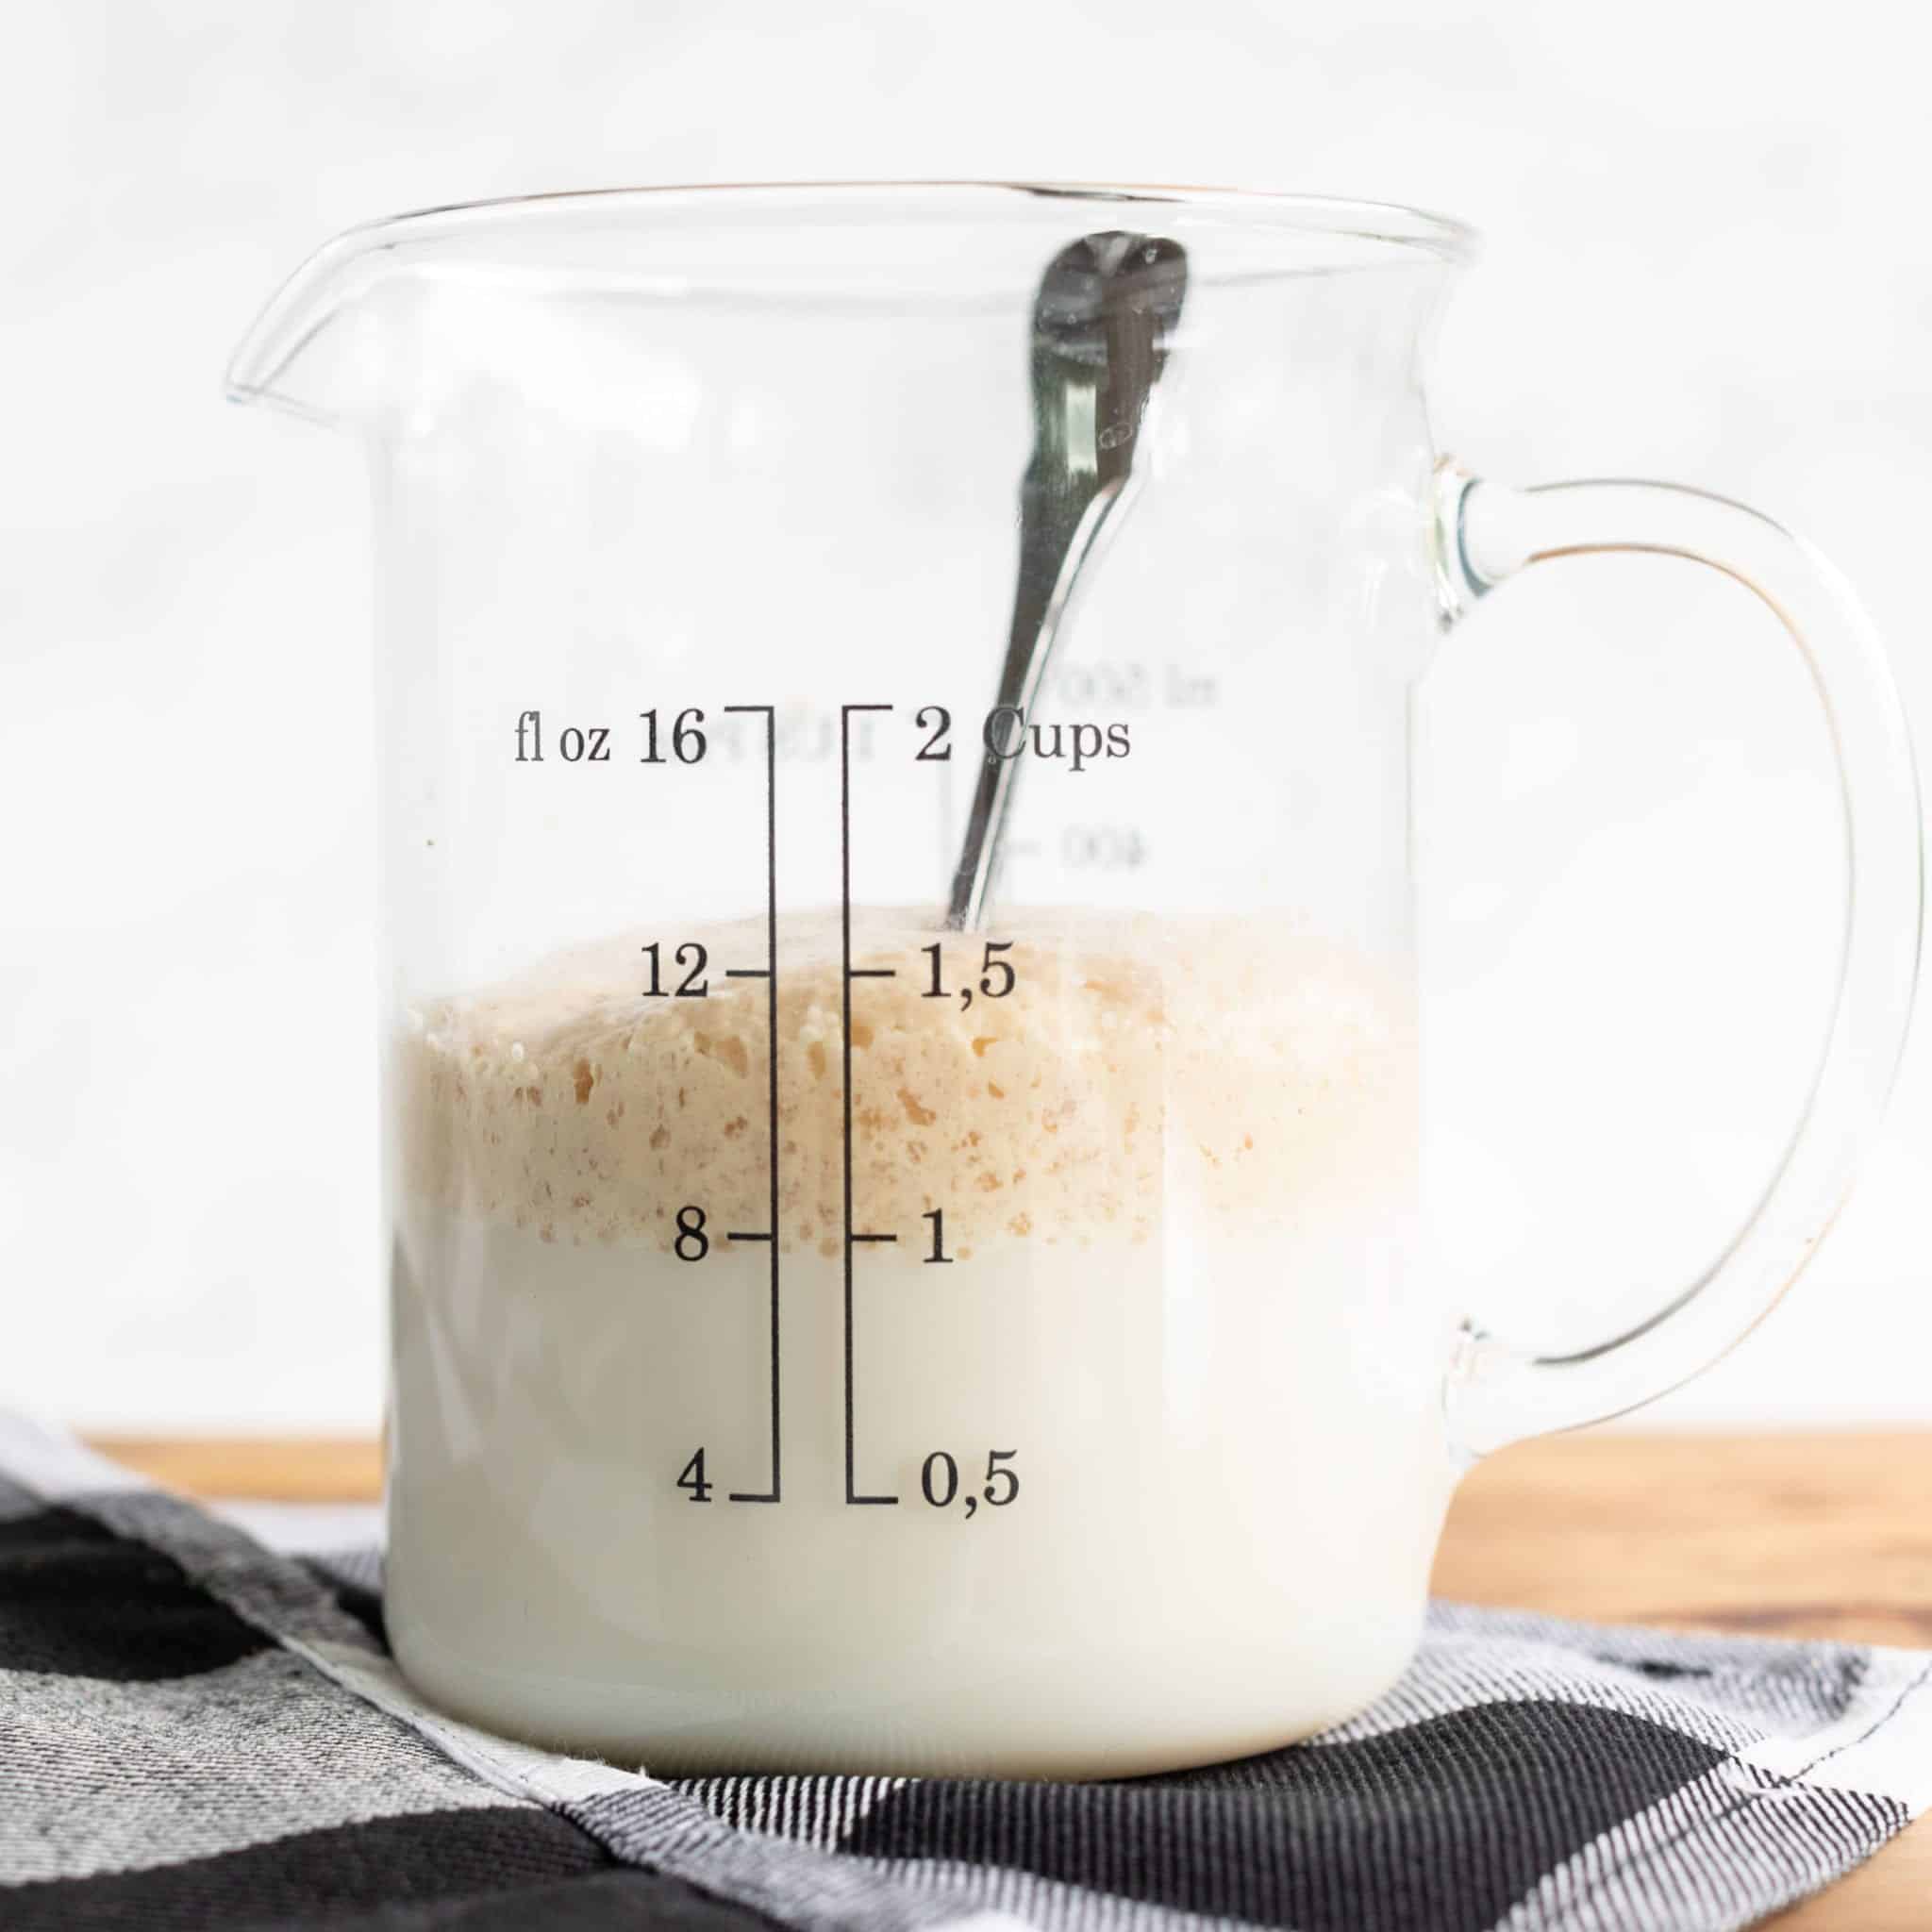
- Yeast matters. Use an instant or rapid rise yeast for this recipe, BUT still allow it to activate before adding it to the dough. I used Instant yeast, allowed it to activate with warm milk and sugar, and it was perfect. (I know, you don’t NEED to activate instant yeast. Let me ask you a question though? Have you ever fallen victim to dead yeast? Because I have. So I like to just know everything I’m using is in good, working order before I let it join the party.)
- Milk can be substituted. Before throwing this tip in this post, I tested using powdered milk and water in place of regular milk. The result was the same and equally delicious. If you use powdered milk, use ½ cup of water and 2 tablespoons of powdered milk. That would be the equivalent of ½ cup of regular milk.
- Ditch the yolk. The egg wash doesn't actually have to be yellow to create the shiny golden color. I used egg whites and water and it worked out great.
Hawaiian Sweet Rolls Video:

Making the Hawaiian Sweet Rolls Super Soft:

Preparing the Dough: Order of Operations
My original recipe was a tiny bit different, but following this mixing order has consistently produced the best results. There's nothing more frustrating than putting the same ingredients in the same bowl and baking them in the same pan, but getting different results each time. I am all too familiar with that issue, and this order works.
- Activate the Instant (or rapid rise) yeast in a separate bowl or measuring cup. To activate the yeast, first heat milk to 110°-115°F. Next, add 1 tablespoon of white granulated sugar to the warm milk, and last, add the yeast. Set the mixture aside for about 10 minutes to let the yeast activate (it should rise and get foamy).
- While the yeast activates, cream the butter, egg, brown sugar, remaining white granulated sugar, vanilla extract, and sea salt flakes in your stand mixer. Once these ingredients are well combined, proceed to the next step.
- Slowly add the pineapple juice. Make sure with each addition it is well incorporated with the creamed mixture.
- Once yeast has activated (it will look foamy), pour the yeast mixture into your stand mixer and combine with other ingredients.
- With the stand mixer on the lowest speed setting, begin adding flour one spoonful at a time. The dough will start out sticky, but as it continues to mix, the stickiness will subside. You'll notice it pulling away from the sides of the bowl.
- Once all of the flour has been added, and using the dough hook attachment, knead the dough with your stand mixer for another 5 minutes.
Double-Proofing the Dough: First Proof
Giving the dough enough time to proof is mission critical here. The trick is that you also don't want to get overly ambitious and over-proof it. Over-proofed dough won't expand very much in the oven and it will end up being deflated, dense, and depressing. Since we don't want any of that to happen, set a timer and stick to the times referenced below.
- After the dough has been kneaded, cover your stand mixer's bowl with plastic wrap and let the dough rest for 1 hour (this is your first proof).
- As the dough proofs, prepare a 9x13 rectangular, nonstick baking dish or pan. Lightly grease and then set it aside.
Double-Proofing the Dough: Second Proof
After the dough has proofed for an hour, remove it from the mixing bowl. Cut the dough into 15 equal portions. You can use a scale to weigh each portion if you need it to be exact, but I eyeballed it.
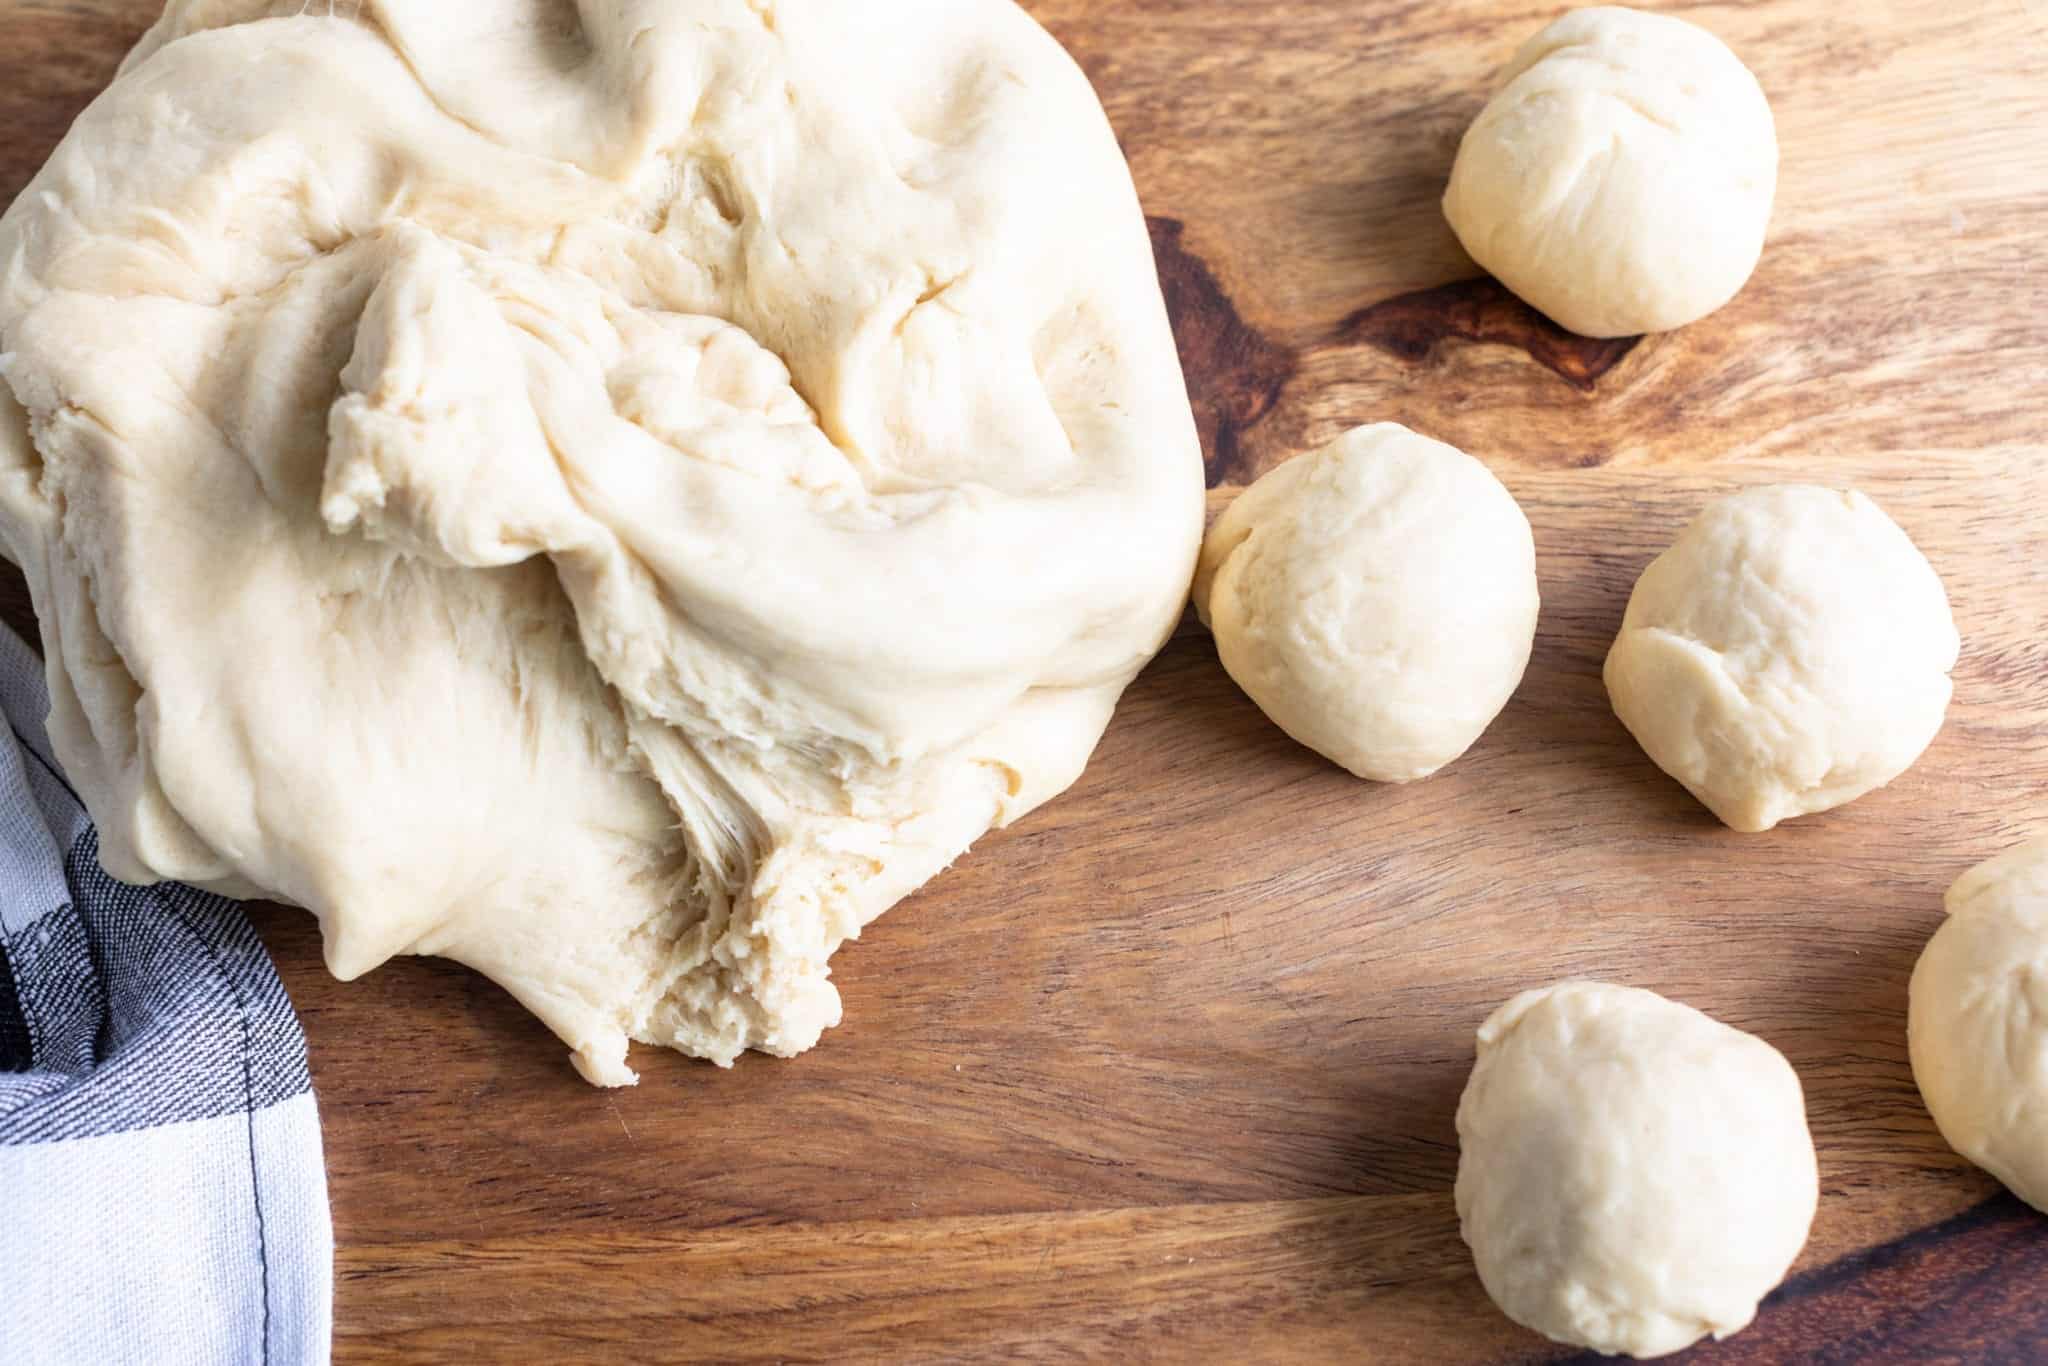
Roll each portion into a round ball.

Evenly space the rolls on the prepared baking dish or pan. Leave them a little room to proof and expand when they bake.
Cover the baking dish with plastic wrap or a damp towel, and place the dish/pan in a warm place for the second proof. If you don't happen to have a warm place available, you can also place it on top of a heating pad. Place a towel between the heating pad and the pan so it doesn't get too hot. The second proof should be 75-90 minutes and the rolls should double in size. If you use plastic wrap you'll be able to see if the 75 minutes was enough or if you should wait the full 90.
Set a timer for 1 hour and when the timer goes off, preheat your oven to 375°F with convection on. Set the timer again for another 15 minutes and check the rolls. If they're ready, proceed to the next step, and if not, give them another 15 minutes.
In the meantime, prepare the egg-wash. Whisk egg white and water together until well combined.

Egg Washed and Ready to Bake
Once the second proof is complete, the rolls should have doubled in size and be touching. Brush the egg wash lightly across all of the rolls and dabbing in all visible areas.
Transfer the rolls in the prepared baking dish to the oven and bake for 10-15 minutes. Rolls are ready when the top of the rolls is evenly browned to a deep golden color.

Optional: As the rolls bake, melt a couple of tablespoons of butter to brush across the top of the rolls when they're done baking. The rolls will be fabulous without the butter, and if you're using them for sandwiches, I'd skip the butter. If they're being served as decadent dinner roll, butter is always your friend (but I promise they won't even need it).
Enjoy and I'd love to hear how you served them! And if you just happened to eat them on your own with the occasional assistance of your spouse, like I did a couple times, I'd love to hear that too!

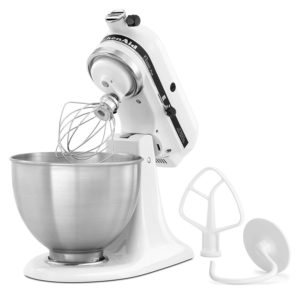
Shop My Favorite Kitchen Essentials for this Recipe!
click photos for links!


Looking for some other delicious recipes? Check these out!
click photos to link to recipe!


EAT & ENJOY!


-
Looking for MORE recipes? Don’t worry, I gotchu. Try sesame soy roasted edamame, sea salt caramel apple [oatmeal] cookies, perfect Fall pumpkin muffins, or my favorite pumpkin roll with cream cheese filling!
*This post may include affiliate links. As an Amazon Associate I earn from qualifying purchases.
Hawaiian Sweet Rolls
Equipment
Ingredients
- ½ cup room temperature pineapple juice OR warm water (110°-115°F) *use pineapple juice for traditional hawaiian sweet roll or use water for a soft dinner roll - both taste great!
- ½ cup warm whole milk (110°-115°F) Or substitute with ½ c warm water and 2 tablespoons of whole milk powder
- 2¼ teaspoon Redstar Insant yeast (2¼ teaspoon = 1 packet)*
- 3 tablespoon white granulated sugar
- 1 egg
- ⅓ cup unsalted butter, softened (⅓ cup of butter = 5 tablespoons plus 1 teaspoon)*
- 1 tablespoon light brown sugar
- ½ teaspoon vanilla bean paste
- 1 ½ teaspoon Maldon sea salt flakes
- 3½-3¾ cups bread flour *all purpose can also be used as a substitute
- 1 egg white, beaten (for egg wash)
- 1 tablespoon cold water (for egg wash)
Instructions
- Activate the yeast before adding to balance of dough ingredients. Heat milk to 110°-115°F. Add 1 tablespoon of white granulated sugar and add yeast. Set aside to let the yeast activate (it should rise and get foamy).
- While yeast activates, cream the butter, egg, brown sugar, remaining white granulated sugar, vanilla, and sea salt flakes in your stand mixer. When well combined, add in the pineapple juice slowly. Allow it to incorporate with each addition.
- Once yeast has activated add it to your stand mixer and combine with other ingredients.

- With stand mixer on the lowest speed setting, begin adding flour one spoonful at a time. The dough will start out sticky, but as it continues to mix, the stickiness will subside. Knead the dough with the hook attachment in your stand mixer for 5 minutes after all flour has been added.
- After the dough has been kneaded, cover the stand mixer's bowl with plastic wrap and let the dough proof for 1 hour.
- While the dough is resting lightly grease a 9x13 nonstick rectangle pan or dish.
- After the dough has completed proofing for 1 hour, remove it from mixing bowl. Cut the dough into 15 equally sized portions, and roll each portion into a ball or rounded square shape. *(if you want smaller rolls feel free to change your portion size, but anticipate a different bake time!)
- Evenly space rolls on prepared baking dish, leaving room for them to proof and expand as they bake. Cover the baking dish with plastic wrap or a damp towel and leave it to proof in a warm area for 75-90 minutes. This proofing time is essential for rolls to become airy and light, so don't cut it short.(Set a timer for an hour and preheat your oven when it goes off. This gives your oven 15-30 minutes to preheat while bread is still proofing). Preheat the oven to 375° F with convection on.
- Rolls should double in size and be touching when the second proof is completed. Whisk 1 egg white and 1 tablespoon of cold water together in a small bowl. Brush egg wash on the rolls, lightly coating all the visible areas.
- Transfer rolls to the oven and bake for 10-15 minutes until the top of bread turns golden-brown evenly across the top of the rolls.
- Optional* while bread is baking melt and brown a couple tablespoons of butter to brush across rolls when they come out of the oven!
- Eat, enjoy, and be sure to let me know how you served them!
Teresa
These look so good! I’m wondering what I’m doing wrong...I’ve had a lot of trouble with this recipe so far. The first time they turned out flat and the dough remained sticky with the amount of flour listed here and then they sunk even lower when I brushed with the egg wash. This time I added more flour and everything seemed to be going fine until the egg wash again. I brushed as lightly as I could, but the whole pan of rolls deflated after I brushed them with the wash, after they had just risen beautifully for 2 hours. Any tips? Would love to see a video tutorial of something like this.
Callie
Hi Teresa!
Thank you! These rolls are one of my favorites and I would love to help! It sounds like the dough is just over-proofing! Over-proofing happens when dough has proofed too long and the air bubbles have popped (or pop when you go to apply the egg wash). You’ll know your dough is over-proofed if, when poked, it never springs back. It sounds like your dough is just proofing a lot faster than mine! The best way to judge it is by periodically poking the dough as it rises and checking the bounce back. You can rescue over-proofed dough though - Press down on the dough to remove the gas, then reshape and reproof it.
You will know if it is under proofed if you poke it and it immediately reshapes itself. I will definitely try and film a step by step video on it soon! Please let me know if this helps! ❤️
Teresa
Thanks for the tip! I did try it again and that definitely helped— they are a work in progress. I still don’t get them looking nice and browned and perfect like yours, but I’ve at least made progress 🙂 did you end up filming a step by step of it?
Callie
Hi Teresa!
That's great to hear! Are you using a conventional oven, or one that uses convection? You can absolutely bake them in a conventional oven without the convection fan, but keep an eye on the bread because the cook time will change a bit! They usually bake for 10-15 minutes with the convection fan on in my oven, my guess is it may take around 20 minutes in a conventional oven to get them nice and brown. 😊
I haven't filmed the step by step yet but I will do that this week or next and post it for you! ❤️❤️ If you're planning to make them before then though please email me pics as you go and I can give input as you're making them!
Hope you’re staying safe and eating great food,
Callie ❤️❤️
Sara Kennedy
Definitely bookmarking this recipe! Looks delicious!
Callie
Thank you Sara! I can't wait for you to try it! I hope you love it!