
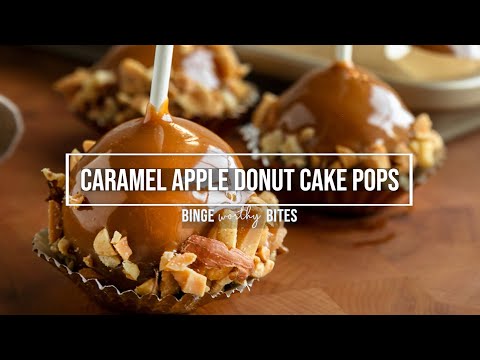
These Caramel Apple Donut Cake Pops are an addictingly sweet riff on classic cake pops, designed to incorporate the ambrosial flavors of market-fresh fall confections and mimic mini caramel apples.
How do you embrace the beginning of autumn? There’s so much to enjoy about this season - the changing weather, and the colors of the leaves, but I especially love all the cozy fall flavors!
Annual trips to the apple orchard or pumpkin patch make up some of our favorite fall activities. Goebbert's Farm nearby has the cutest garden market that we beeline towards every single time we visit. It's a goldmine of amazing fall sweets & treats. I love picking up fresh apple cider and donuts to take home and enjoy!

Caramel, Taffy, Candied Apples
In the Chicago area and the Midwest, "Affy Tapples" was the brand of caramel apples we grew up to know and love. Until now, I always referred to them as Taffy Apples, but unbeknownst to me the label clearly reads "Affy Tapples". Was I the only one to miss out on this word scramble all these years?
The crisp apples freshly dipped in famous "Affy Tapples" small-batch caramel and toppings were a beloved pastime and treat for my family. We couldn't get enough of these growing up, but not just in the fall. I didn't even know you could buy them off-season, but somehow my dad managed to find them all year round! They are seriously some of the best caramel apples out there.
Both the look and taste of the "Affy Tapples" inspired this recipe. To kick it up a notch, I wanted to incorporate even more fruity, spicy, and comforting flavors of fall. I hope you enjoy this miniature form of a bite-sized caramel apple cake pop.
Cake Pops, but with Donuts
Have you ever "accidentally" picked up an extra box of donuts with every intention of eating (or sharing) them? My eyes are notoriously bigger than my stomach, so I'm totally guilty of this. After sitting with the extra donuts for a day or two, the creative juices started to flow and I got to thinking about how I could repurpose them to make a fun, festive fall treat.
This recipe has a semi-homemade vibe because it uses freshly baked goods, but the added perk is that you don't have to bake them from scratch. It essentially cuts the time to make them in half! Made up of very few ingredients, this no-bake, sweet, crunchy treat is super simple and enjoyable to create.
So I bring you an old school method for making cake pops...but in this case with crumbled donuts instead of cake.
Ingredients
- Apple butter
- Apple fritters or glazed apple cider donuts
- Heavy whipping cream
- Peanuts (chopped)
- Vanilla bean paste
- Werther's Original chewy caramels
- Cake pop or lollipop sticks
- Cupcake liners (mini)
Video
Transforming Donuts to Cake Pops
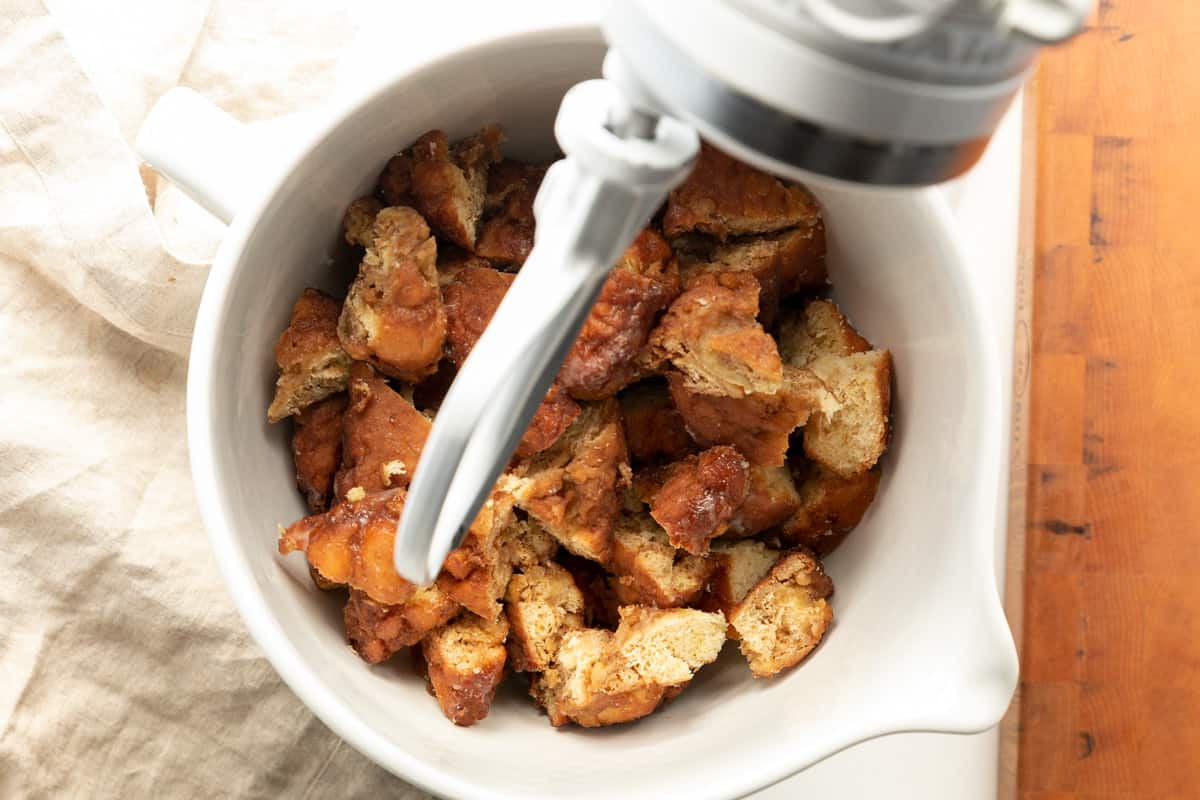
Cut up the apple fritters or glazed apple cider donuts into bite-sized pieces. Turn on the Kitchen Aid or mixer to crumble the pieces completely before adding any wet ingredients. Add the vanilla bean paste and apple butter once the pieces are completely crumbled. Be mindful of adding the apple butter one tablespoon at a time.
Apple Butter: Tips for Success
Let's chat about the apple butter. It really is the key ingredient that elevates these cake pops and adds a smooth texture. The concentrated flavors of the apple butter naturally pair well with the fritters and/or donuts.
The moisture and glaze level of the type of donut used will ultimately determine how much apple butter is needed. Think about it in terms of how the density of Krispy Kreme (super lightweight) varies so much from the texture of a luscious fried apple fritter. The use of denser donuts or fritters will require more apple butter in the mixture, whereas the use of lighter donuts with more glaze will require less.
Gradually add one tablespoon of apple butter at a time until the dough blends together to form a moist workable consistency resembling cookie dough, not gooey like cake-like batter. The dough should be able to be handled without sticking and form into a large ball without crumbling.
This recipe can easily be adapted with spice cake or apple cider sugar cake donuts as well - just keep an eye as some extra apple butter may be needed!
What if I Added Too Much Apple Butter?
On the off chance that too much apple butter has been added, I have a foolproof tip. Add some flour or instant vanilla pudding powder (for more flavor) little by little if the consistency of the dough gets too runny to work with. Hopefully, you won't need to use it, but the flour or pudding powder should definitely help reverse it and add more density if needed.
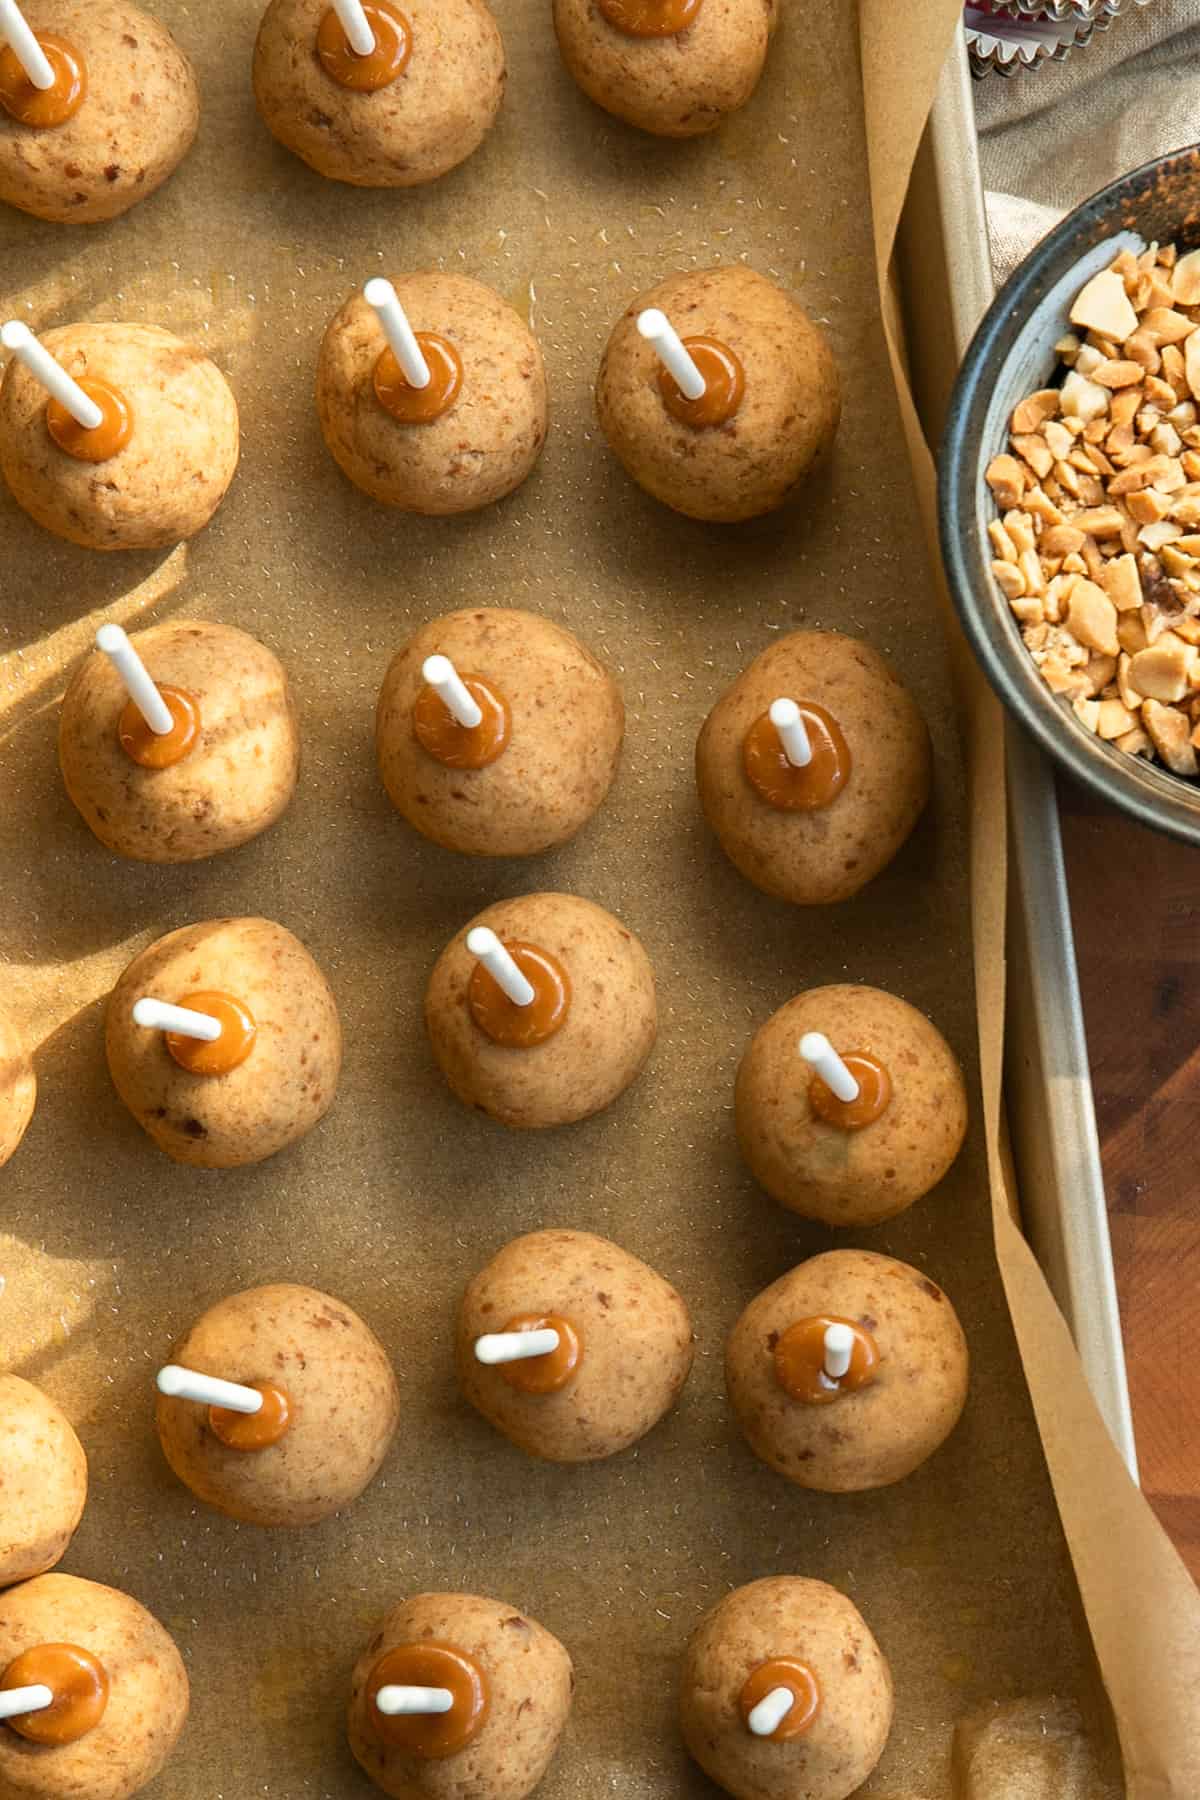
Assembling the Cake Pop Donut Balls
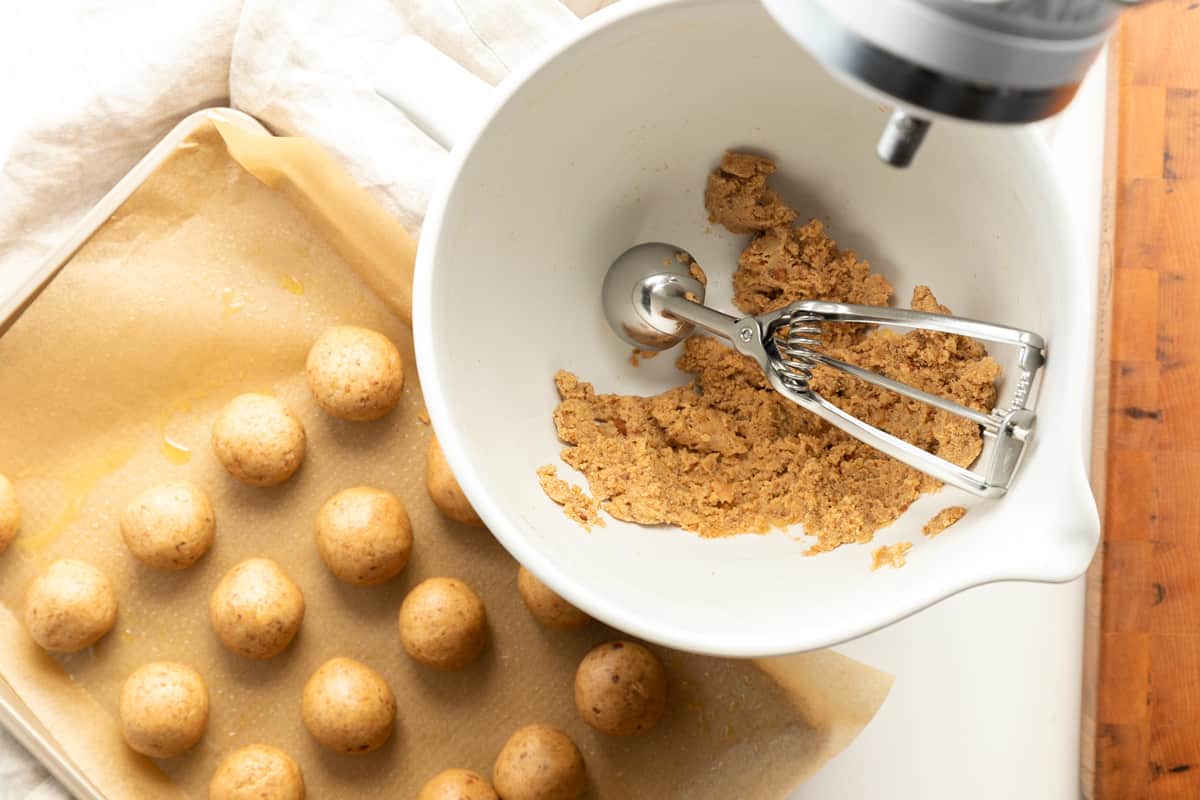
To begin assembling, use a 1-ounce cookie scoop to evenly portion and roll the dough into balls.
In a microwaveable bowl, combine about a handful of caramels (about 8 for a single batch) and heavy whipping cream in a small bowl. Warm up the combined ingredients in the microwave for about 30 seconds. You’ll want to do this in 10-second increments, stirring after each round to ensure the caramel doesn’t burn.
Dip the ends of your bare cake pop sticks into the caramel that was just melted. This will help the balls of dough adhere to the sticks so they don't fall off later when fully submerged in caramel. Then, dip the caramel-coated end of the stick about half an inch into the dough balls you have rolled, and place them on the baking sheet.
Optional: Once all the sticks are dipped into the dough balls, place them in the freezer for about 15-20 minutes. The cake pops do not need to be frozen solid, but allowing time to harden will make them easier to fully submerge in the caramel.
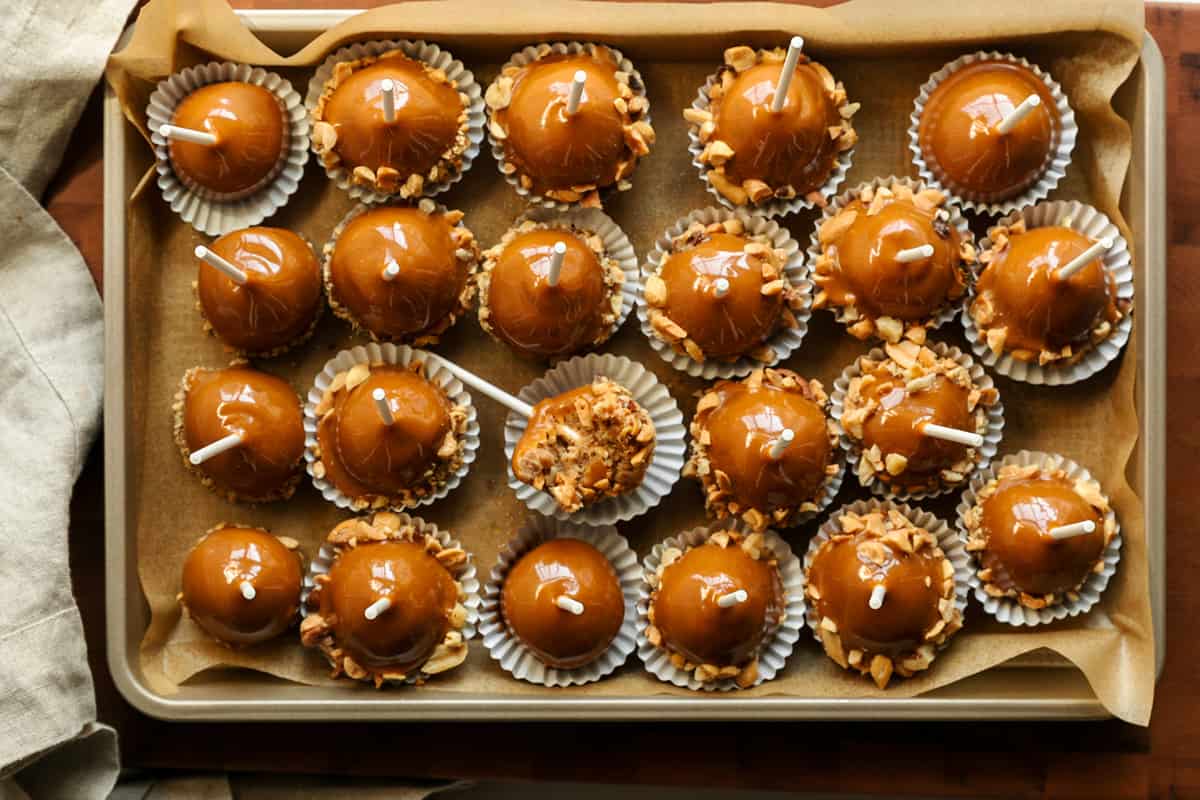
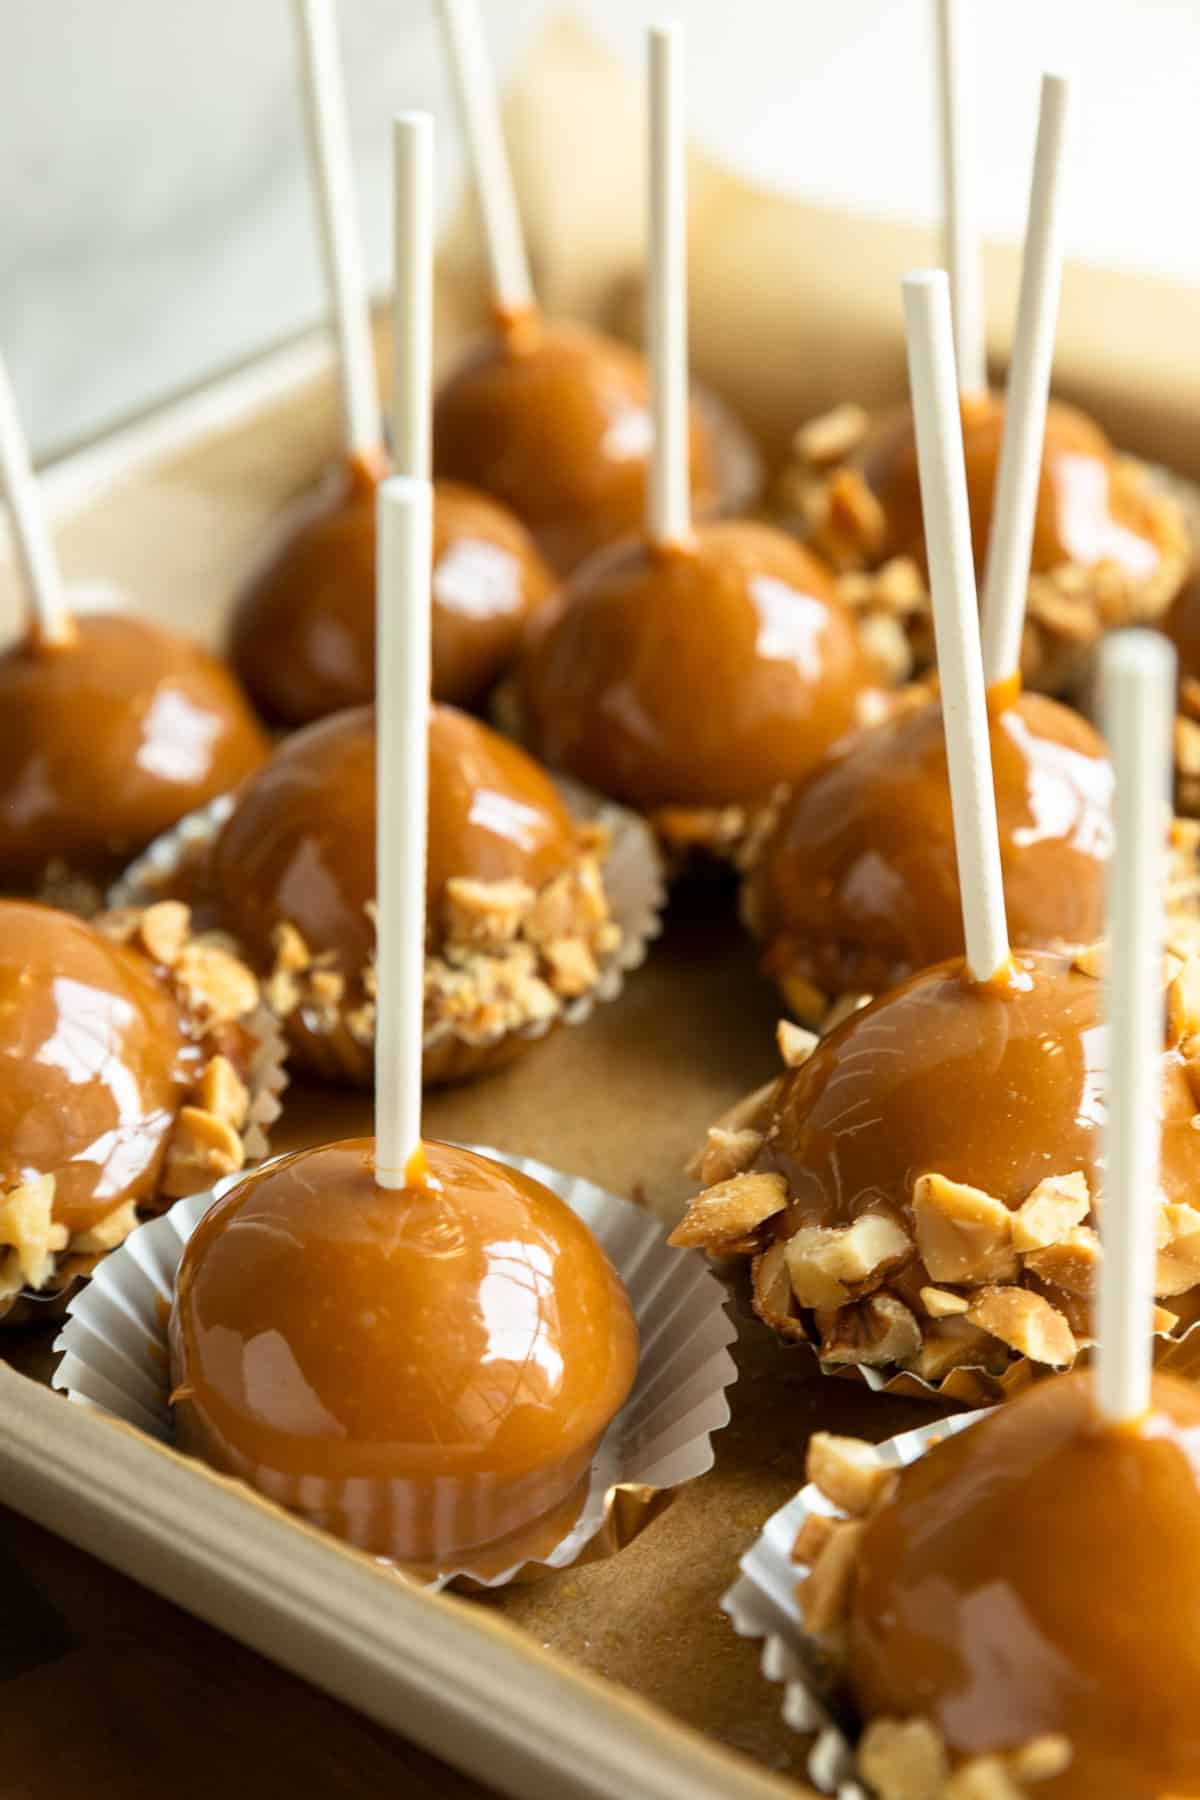
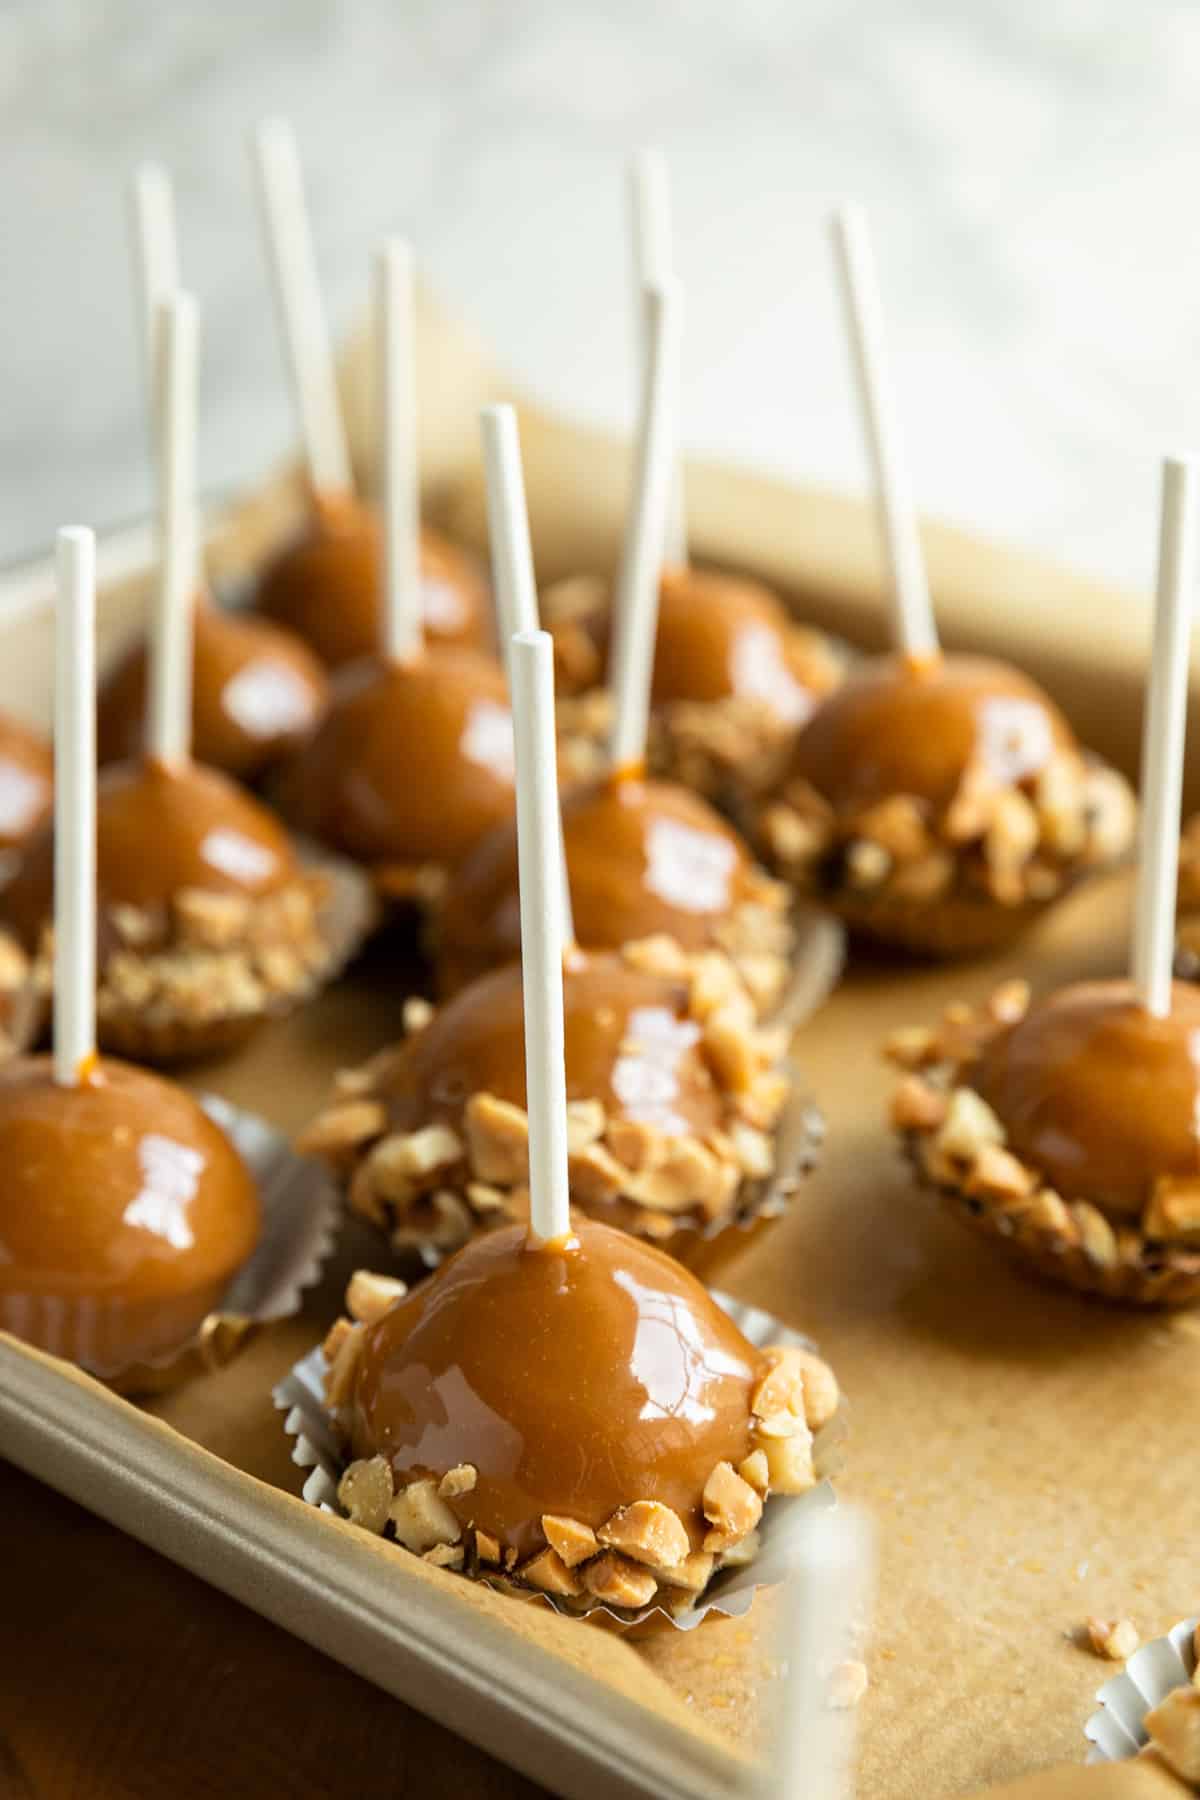
Caramel Covered Donut Cake Pops
Find your favorite creamy, chewy caramel at the store that will easily melt. I used Werther's Original chewy caramels combined with heavy whipping cream and it worked out perfectly!
Heat the remaining caramel chews from the bag with heavy whipping cream in a saucepan on low heat. Continuously stir until the mixture is smooth and melted. Scoop the warm melted caramel with a large spoon and twirl the cake pop around in the spoon rather than dipping the entire cake pop into the saucepan.
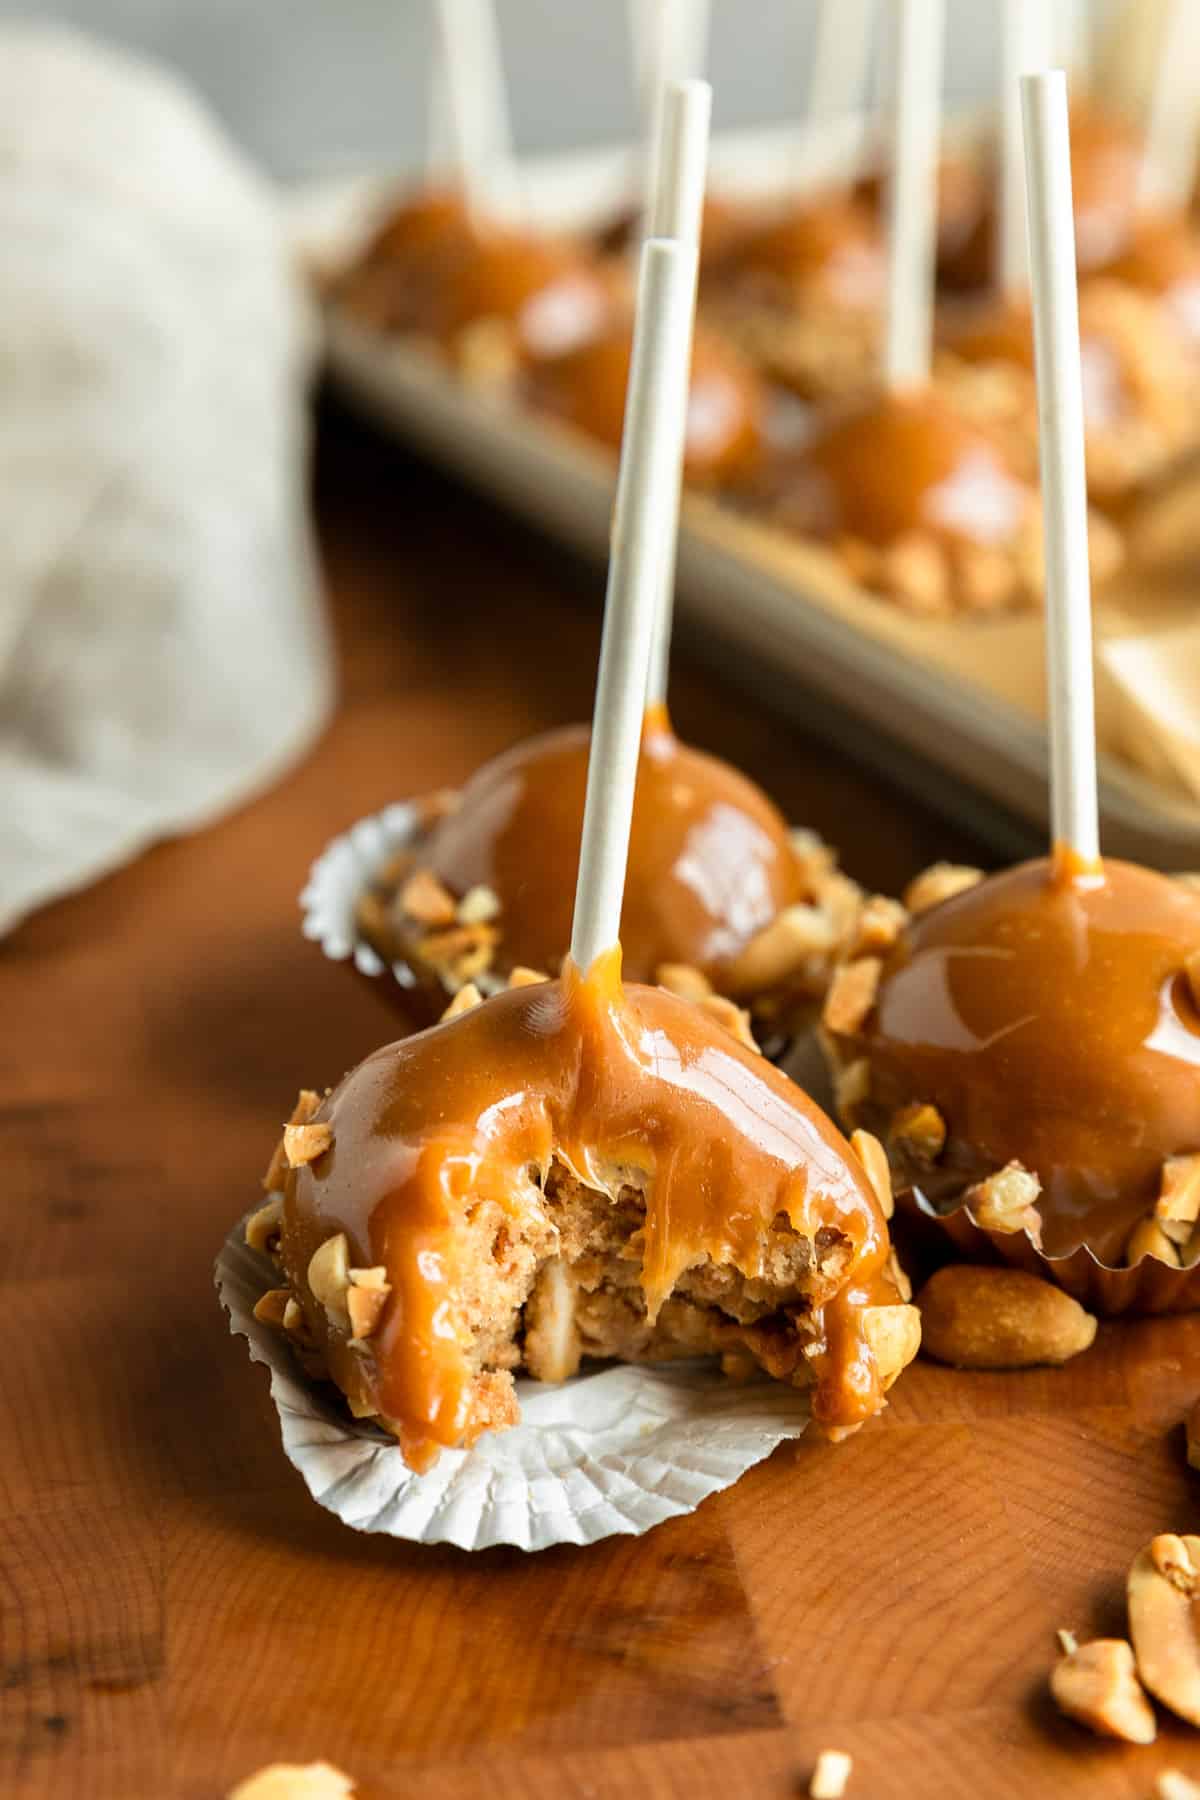
Immediately after twirling the cake pops in the hot caramel, dip them in the bowl of chopped peanuts then place them in a cupcake liner. For a pretty presentation, dress up your cake pops in mini metallic foil cupcake liners.
Chilling the Chewy Caramel
I tend to keep cake pops chilled to maintain their shape and to preserve freshness longer. Chilling is optional, but it does help the dough balls maintain a nice round shape.
With that in mind, the colder caramel gets the more it will harden. And as we know, chewy caramel is easiest to eat at room temperature. If the cake pops are chilled to firm up more quickly, remove them from the fridge for about ten minutes prior to serving so that the caramel can soften slightly. This will bring the coating to about the same hardness as a caramel apple.
Decorating Cake Pops with Toppings
The roastiness and crunch of chopped peanuts perfectly complement the golden glow of these Caramel Apple Donut Cake Pops. While the cake pops are firming up in the freezer, chop peanuts and place them in a bowl.
In place of peanuts, there are so many other fun toppings the cake pops can be decorated with as well; other nuts like pecans or walnuts, sprinkles, mini chocolate chips, or mini M&Ms.
Even if they are left plain and simply dipped in caramel, these Caramel Apple Donut Cake Pops will be just as mouthwatering!
Craving More Caramel?
If you're having a craving for caramel or simply want to impress with some other delectable caramelly desserts, check these out!
Salted Caramel Turtle Brownies
Brown Butter Sugar Cookie Bars with Salted Caramel Frosting
Sea Salt Caramel Apple Oatmeal Cookies
Caramel Apple Donut Cake Pops
Equipment
Ingredients
- 12 apple fritters or glazed apple cider donuts
- 2-4 tablespoon apple butter add one tablespoon at a time; will differ based on moisture and glaze level of the donuts used
- 1 teaspoon vanilla bean paste
- 10 oz Werther's Original chewy caramels
- 3 tablespoon heavy whipping cream
- chopped peanuts
- cake pop or lollipop sticks optional
- cupcake liners (mini) optional
Instructions
- Line a baking sheet with parchment paper and lightly grease.
- Cut up the apple fritters or glazed donuts into bite-sized pieces. Turn on the Kitchen Aid to crumble the pieces completely before adding any wet ingredients.
- Once all the pieces are crumbled add vanilla bean paste and begin adding apple butter, one tablespoon at a time. Add in gradually, until it reaches a moist consistency resembling cookie dough, but not gooey like cake batter.
- The dough should form into a large ball and hold when you roll it, without crumbling.
- Use a 1-ounce cookie scoop to evenly portion and roll the dough into balls.
- In a microwaveable bowl, combine about a handful of caramels and a third of the heavy whipping cream in a small bowl. Warm in the microwave in 10-second increments, stirring after each round, for a total of 30 seconds. This will help you ensure the caramel doesn't burn.
- Dip the ends of your bare cake pop sticks in the bowl with the caramel you just melted. This will help the balls of dough adhere to the sticks so they don't fall off while being dipped.
- Then, dip the caramel coated end of the stick about half of an inch into the dough balls you have rolled, and place them on the baking sheet.
- Once you have dipped all the sticks into the dough balls, place them in the freezer for about 15-20 minutes. (this step is optional, but freezing the cake pops to the stick makes them easier to dip in caramel)
- While the cake pops are firming up, chop peanuts and place them in a bowl. And, prep cupcake liners.
- Heat up the remaining caramel and heavy whipping cream in a saucepan on low heat. Continuously stir until the mixture is smooth and melted.
- Scoop the warm melted caramel with a large spoon and twirl the cake pop around in the spoon rather than dipping it.
- Immediately after twirling the cake pops in the hot caramel, dip them in the chopped peanuts then place in a cupcake liner.
- Chill cake pops in the refrigerator to preserve shape and maintain freshness. Remove from refrigerator at least 10 minutes prior to serving.
Leave a Reply