

This Easy White Sandwich Bread is soft, fluffy, and made for everyday sandwiches. The crust bakes up golden and tender, while the crumb stays soft and light for days. It's perfect for school lunches, PB&Js, grilled cheese, or a simple slice of toast.
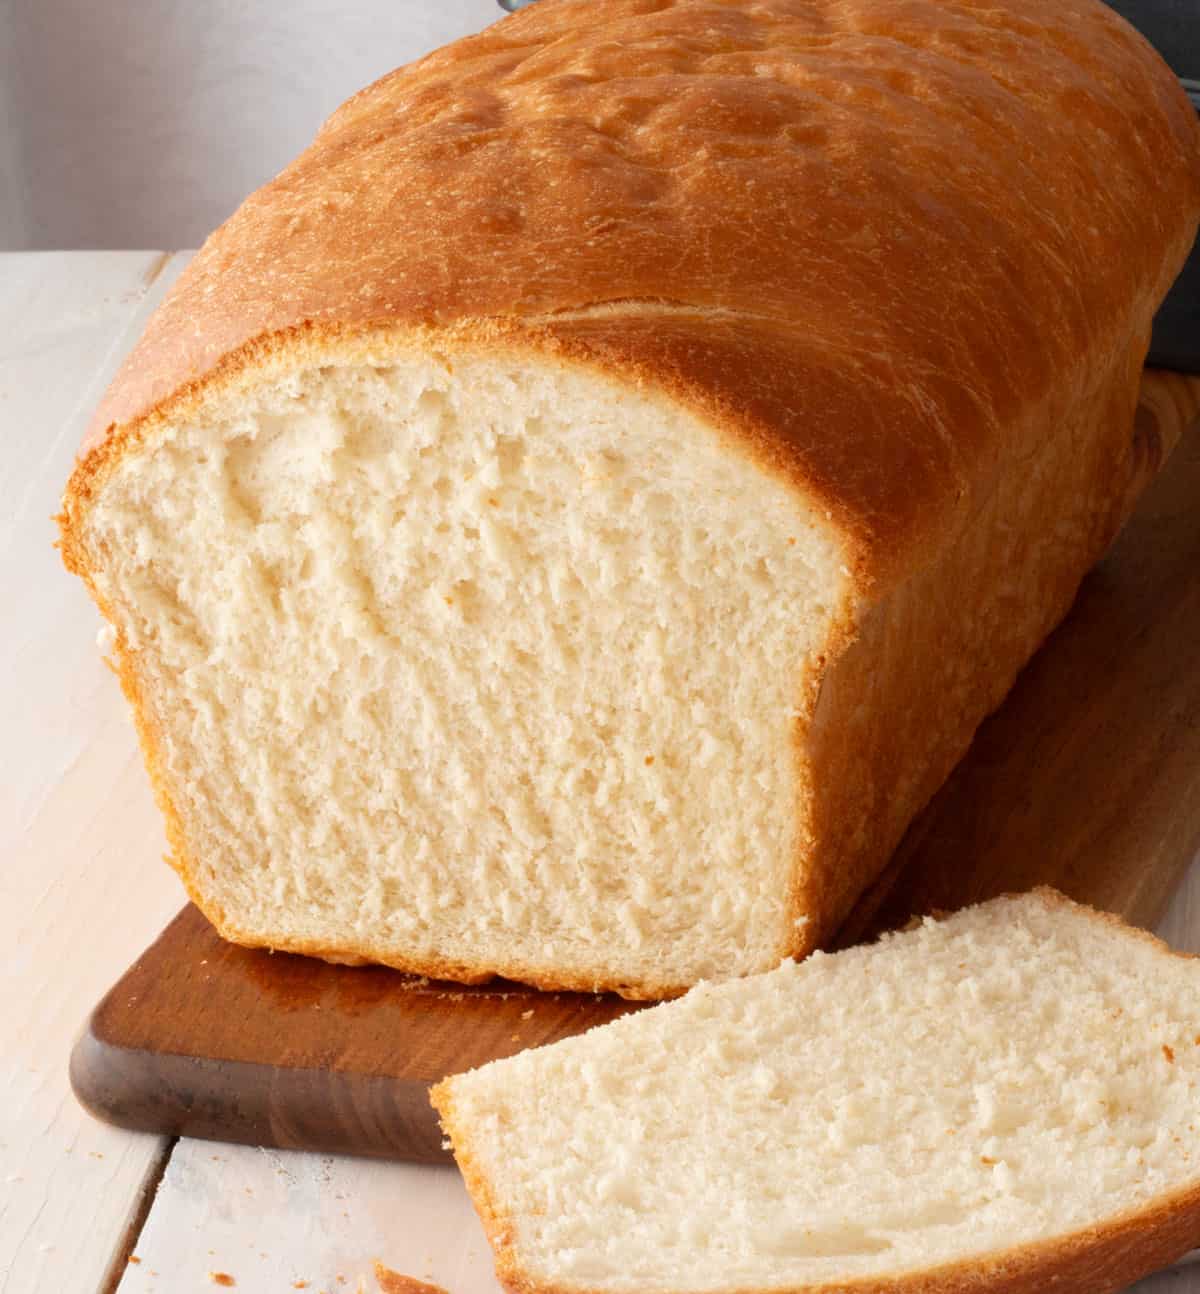
White Sandwich Bread All Purpose Dough
Want to know one of the best parts about this easy white sandwich bread recipe? It has a perfect all-purpose dough. The recipe makes two 9×5-inch loaves, so you can make two classic sandwich loaves or split the batch and turn each half into something completely different.
Try using the dough for other soft breads like:
- Hamburger and hot dog buns
- Dinner rolls
- Cinnamon rolls
- Garlic knots
- Stuffed bread pockets
For something sweet, use half the dough to make Cinnamon Swirl Raisin Bread. You’ll get one classic sandwich loaf and one cinnamon-swirled loaf from the same batch. I've included the instructions below!
How to Make White Sandwich Bread
This easy white sandwich bread is a cinch to make and uses simple, everyday ingredients and regular yeast. No sourdough starter is required. The dough is incredible versatile, the ingredients are easy to swap (see Notes). In a warm kitchen, you can have fresh bread from start to finish in just a few hours.
Ingredients for Homemade White Sandwich Bread
- Milk (or powdered milk)
- Instant or active dry yeast (your preference)
- Water
- Maldon sea salt flakes
- Sugar
- Butter or vegetable oil
- Bread flour (or all-purpose flour)
Can I use all-purpose flour instead of bread flour?
Yes! Bread flour gives the loaf a slightly higher rise and chewier texture, but all-purpose flour makes a soft sandwich loaf too.

From Bowl to Oven in About 2 Hours
- Mix ingredients in one bowl, by hand or with a stand mixer.
- Knead until smooth, shiny, and elastic; see the detailed instructions below for stand mixer and hand-kneading times.
- Let rise until doubled, about 30-60 minutes depending on your kitchen.
- Shape into loaves, buns, cinnamon rolls, garlic knots, or the bread variation of your choosing.
- Let rise again until puffy and properly proofed, usually about 30–45 minutes. For sandwich loaves, the dough should be nicely domed and about 1 inch above the rim of the pan. Timing will vary depending on what you’re making and the temperature of your kitchen.
- Bake.
And that’s really all there is to it. In just a couple of hours, you’ll have fresh homemade bread. Keep scrolling for the full kneading, shaping, and baking instructions, whether you’re using a stand mixer or working by hand.
How to Knead Dough for White Sandwich Bread
One of the best things about this easy white sandwich bread dough is that it comes together beautifully whether you’re using a stand mixer or kneading by hand. I’ve included instructions for both methods because everyone bakes a little differently, and each has its perks.
If you’re using a stand mixer, it’ll be your best friend here. You’ll need one with a fairly large bowl if you’re making two loaves. Mine’s a tight squeeze, but it gets the job done. I just keep an eye on it and pull the dough down from the top of the hook as it mixes. You’ll know it’s ready when it looks smooth, elastic, and just a little shiny.
Prefer to knead by hand? This dough is meant to stay soft and slightly tacky, but it becomes much easier to work with as you continue kneading. It’s a great way to get a feel for the dough and watch how the texture changes as you work with it.
Extra Tips for Kneading by Hand
- Use an extra-large bowl to combine the ingredients and begin kneading the dough right inside the bowl.
- Once the butter is added, the dough will feel slippery at first. Keep kneading until the butter is incorporated and the dough begins to come together.
- Work the dough in the bowl for about 2–3 minutes, then turn it onto a well-floured surface.
- Knead for about 5 more minutes, adding a little additional flour only as needed, until the dough is smooth, shiny, elastic, and slightly tacky.
- If you have a bench scraper, use it to help fold and turn the dough.
- Let the dough rise in a warm spot, around 75-80°F, until doubled in size before shaping.

The Secret to Soft White Sandwich Bread
The recipe calls for a mix of milk and water, but it’s flexible. You can use all milk for a richer, more tender loaf, all water if you’re out of milk, or a combination of both.
My little secret? I keep powdered milk in the pantry at all times. It works great in bread dough, it’s inexpensive and shelf-stable, and and it means I can save the fresh milk for drinking.
Can I add powdered milk directly to the dough?
Yes. If you’re using powdered milk, you can mix the powder right in with the flour and use water for the liquid. You can also prepare it according to the package directions and use it just like regular milk. Either way works.
What kind of powdered milk is best for this dough?
Nonfat dry milk is the best and most reliable option. It adds softness and helps the crust brown evenly. Whole milk powder also works if you are wanting a richer flavor. I usually keep both nonfat and powdered buttermilk on hand, for biscuits and pancakes, too!
Baking & Tips for Easy White Sandwich Bread
A few quick tips to help you get the best loaf every time:
- Flour and time will vary. Every kitchen is a little different. Cooler temps (around 70°F or below) mean longer proofing; warmer ones (78–80°F) will rise fast.
- Watch the color. Use your oven light and tent the loaf with foil if it starts to brown too quickly.
- Know when it’s done. The loaf should sound hollow when tapped and read 190°F internally.
- Storage tip: Once cooled, store at room temperature for up to 4 days, or freeze for longer storage. I like to pre-slice mine before freezing so I can grab individual slices and pop them straight into the toaster.

My Favorite Variation: Cinnamon Swirl Raisin Bread
If you want one classic loaf and one sweet loaf, use half of the dough after the first rise to make Cinnamon Swirl Raisin Bread.
For one 9×5-inch loaf, you’ll need:
- ½ batch Easy White Sandwich Bread dough
- 4-6 tablespoons butter, softened
- ¾-1 cup brown sugar
- 2 teaspoons ground cinnamon
- ½ cup raisins
Dark brown sugar gives the swirl a delicious molasses flavor. About ¼ cup of butter is usually just right for me, but you can use a little more depending on how gooey you like your cinnamon swirl.
How to Make Cinnamon Swirl Raisin Bread
Using half of the risen dough from the recipe, roll it into about a 9×12-inch rectangle. It doesn’t have to be perfect, mine never is. Just keep the short side around 9 inches so it fits neatly into your loaf pan.
Spread the softened butter over the dough, leaving about a ½-inch border. Mix the brown sugar and cinnamon together and sprinkle it over the butter, then scatter the raisins on top.
Starting at one of the short ends, roll the dough up snugly but gently. Pinch the seam closed and place it seam-side down in a well-buttered 9×5-inch loaf pan.
Let it rise until puffy and nicely domed, about 30–45 minutes in a warm kitchen.
Bake at 375°F for 30–40 minutes. If the top starts getting too dark, tent it loosely with foil.
If you want to use the full batch for Cinnamon Swirl Raisin Bread, simply double the filling ingredients and make two loaves.
And save a few slices for French toast. The cinnamon-sugar edges caramelize beautifully while the center stays soft and custardy, especially good with maple syrup or a dusting of powdered sugar.
More Bread Recipes
Once you bake this easy white sandwich bread the first time, you’ll see why I keep coming back to it! It’s so simple to make, always reliable, and truly all-purpose. Make two classic loaves, turn one into Cinnamon Swirl Raisin Bread, or use the dough for buns and rolls.
New England Style Rolls (hot dog buns)
Sweet Potato Rolls with Honey Mustard Glaze


Tag @bingeworthybites on Instagram and use #bingeworthybites so I can see what you made!
Easy White Sandwich Bread Recipe
Equipment
Ingredients
- 1 cup milk gently warmed (no hotter than 100°F); prepared powdered milk may be used instead
- 4 teaspoon instant or active dry yeast about 2 (.25 oz) packets
- 2 ½ cups water milk may be used instead for a richer loaf
- 2 tablespoon Maldon sea salt flakes
- 3 tablespoon sugar
- ¼ cup butter or vegetable oil room temperature
- 9 cups bread flour all-purpose flour also works. You may need a little additional flour depending on your kitchen conditions; see Notes below
- 2 tablespoon butter melted, for brushing on before baking
Instructions
- Mix & Knead the Dough
- Combine the warm milk and yeast in a large mixing bowl or the bowl of a stand mixer fitted with the dough hook. Let sit for about 5 minutes, until you see small bubbles and a little froth, which means the yeast is active.
- Add the water (or milk, if preferred), salt, and sugar. If using a stand mixer, mix on low speed to combine. If mixing by hand, stir to combine.
- Add about 8 cups of flour if using a stand mixer, or about 8½ cups if mixing by hand. If using a stand mixer, keep the mixer on low and scrape down the sides and bottom of the bowl as needed. If mixing by hand, stir with a sturdy spoon or use clean hands until most of the flour is incorporated. The dough will be quite wet at this point, like a thick cake batter.
- Let the dough rest for 5 minutes so the flour can hydrate and fully absorb the liquid.
- Add the softened butter or vegetable oil a little at a time. If using a stand mixer, mix on low until fully incorporated. If mixing by hand, work it into the dough with your hands until fully incorporated. The dough may feel slippery at first, but it will come together.
- Add the remaining flour a little at a time, up to about 1 cup if using a stand mixer, or about ½ cup if mixing by hand, until the dough begins to pull together. Add additional flour only if needed.If using a stand mixer, look for the dough to pull away from the sides of the bowl in thick strands. If mixing by hand, it should begin to come together and feel less sticky. Avoid adding too much flour; the dough will continue to firm up as it kneads, and too much flour can make the finished bread less tender.
- If using a stand mixer, continue knead on low to medium-low for 5–7 minutes, until the dough is smooth, shiny, elastic, and forms a ball around the dough hook. If mixing by hand, continue to work the dough in the bowl for 2–3 minutes, then turn it onto a well-floured surface and knead for about 5 more minutes, adding a little flour as needed, until smooth, shiny, and elastic.
- Using a light touch and lightly floured fingers, shape the dough into a ball. It should feel cushiony, spongy, and silky, almost like a heavy pillow.
First Rise
- Place the dough in a lightly greased bowl or bread tub. Cover and let rise in a warm spot, ideally around 75–80°F, until doubled in size. This may take about 30 minutes in a warm kitchen or up to an hour if your room is cooler.
- While the dough rises, grease two 9×5-inch loaf pans with softened butter, oil, or cooking spray. Butter gives the best color and flavor.
Shape the Loaves
- Once the dough has doubled, turn it out onto a lightly floured surface and divide it into two equal portions.
- Working with one portion at a time, roll the dough into a 9×12-inch rectangle, gently pressing out any large air bubbles.
- Starting from the short, 9-inch end, roll the dough tightly into a log about the length of your loaf pan.
- Tuck the ends under and pinch the seam closed. Place the loaf seam-side down in a greased 9×5-inch loaf pan. Gently pat the top to even out the shape and help it fill the pan.
Second Rise
- Cover the loaves lightly and let proof in a warm spot, around 78°F, until the dough is about 1 inch above the rim of the pan and nicely domed, about 30–45 minutes depending on room temperature.
- Avoid overproofing; the loaves will continue to rise in the oven.
- While the dough proofs, preheat the oven to 375°F.
Bake
- Once proofed, gently brush the tops with melted butter.
- Bake on the middle rack for 30–40 minutes. Check the loaves around the 20-minute mark and rotate the pans for even browning. If the tops begin browning too quickly, tent loosely with foil.
- The loaves are done when golden brown on all sides and the bottoms sound hollow when tapped, or when an instant-read thermometer inserted into the center reads about 190°F.
- Remove from the oven and let cool in the pans for 5 minutes.
- Run a butter knife along the edges to loosen, then carefully turn the loaves out onto a wire rack or countertop. If needed, return them directly to the oven rack, without the pans, for an additional 5 minutes to finish baking.
- Let cool completely for about 45 minutes before slicing. Slicing too early can make the crumb gummy.


Leave a Reply