

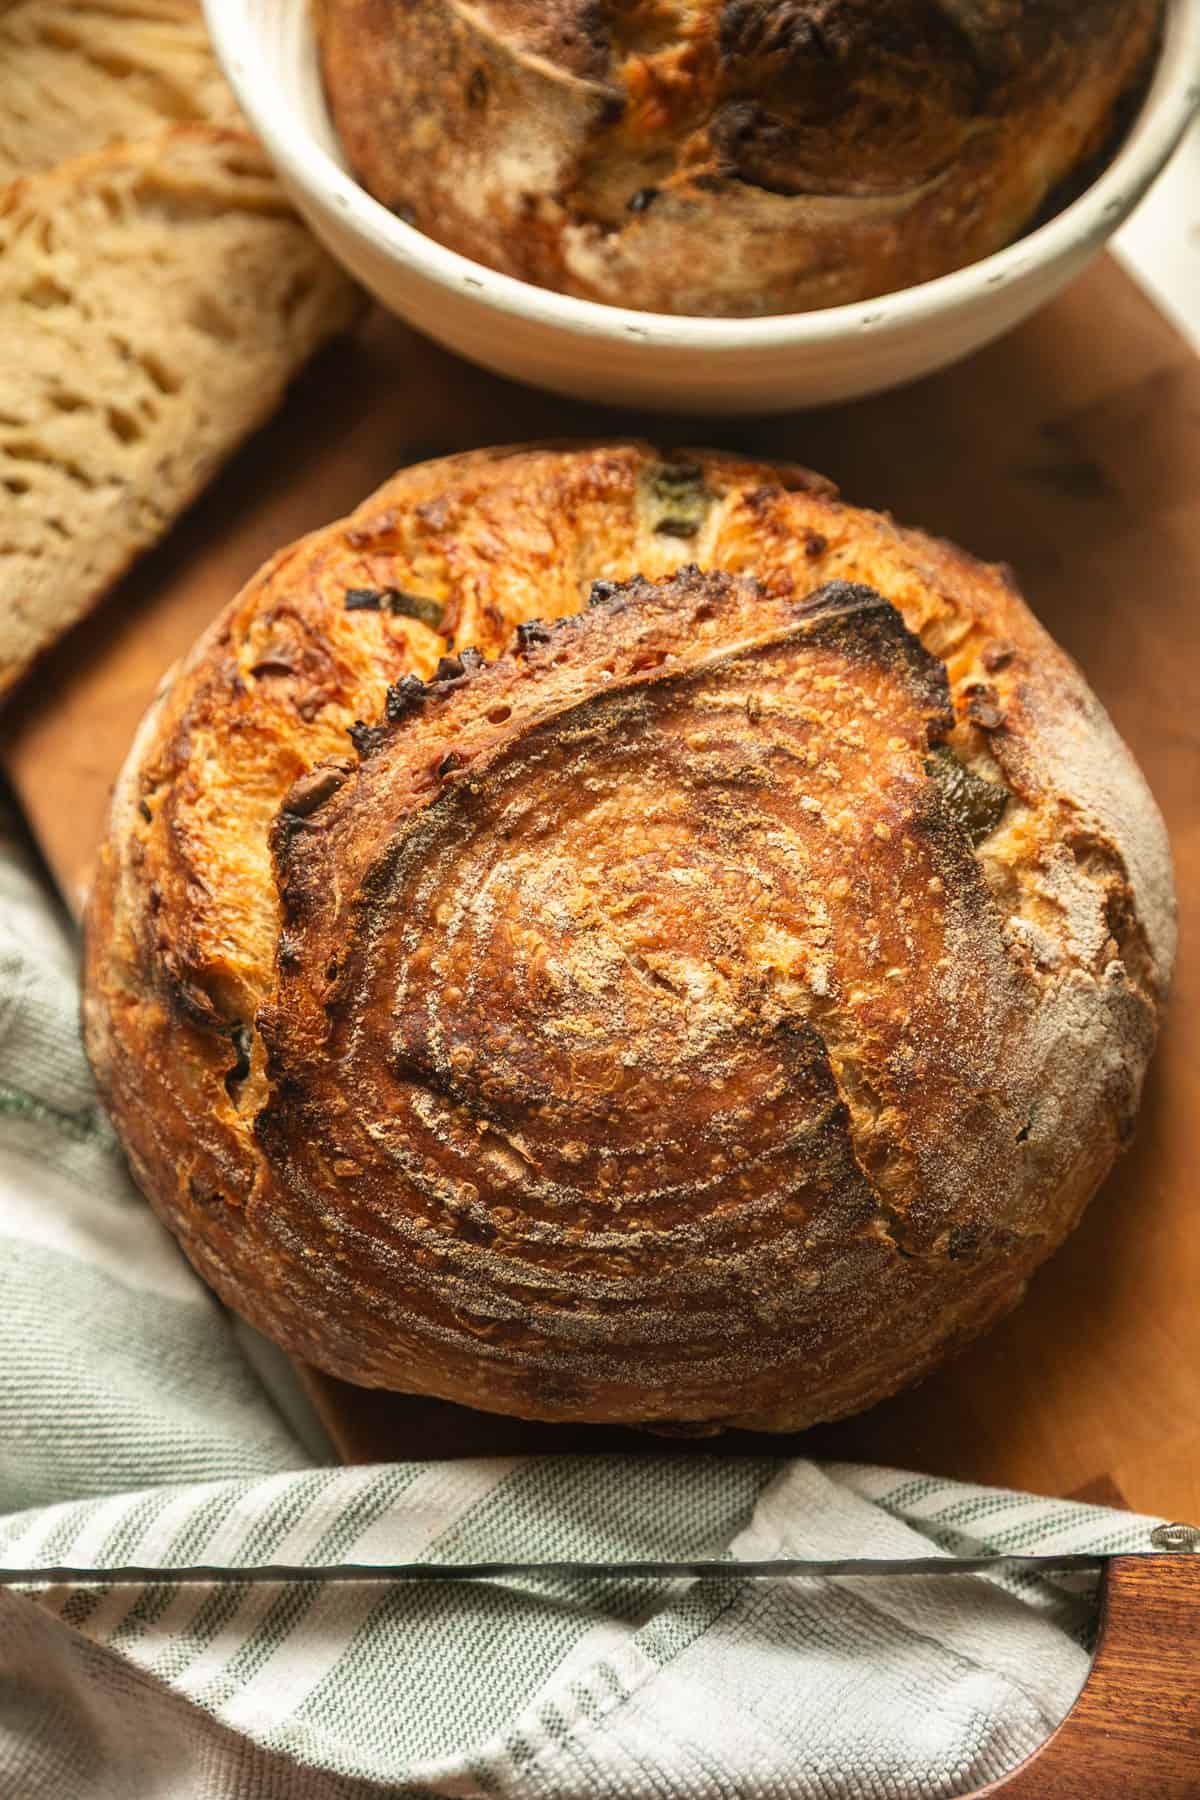
This Jalapeño Cheddar Sourdough Bread has everything I love about a good loaf. A deep golden, crackly crust, a soft and chewy center, pockets of melted cheddar. This summer, I even got to use jalapeños straight from my garden, which was especially fun.
Over the past several months, I’ve experimented with all kinds of sourdough flavors, but this one has become the clear favorite. It’s the loaf my family and friends request all the time and one of my favorites to make and gift.

The fresh jalapeños mellow out as they bake, giving you plenty of fresh jalapeño flavor without a ton of heat, while the cheddar melts throughout the loaf. But the crispy bits of cheddar along the crust? Those are my absolute favorite bites!
How I Started Baking Sourdough
It all started around Christmastime at a "favorite things" party. The idea was simple, everyone brought five of the same item, something they genuinely loved, to share with the group. As we all traded our favorite finds, I walked away with a sourdough starter.
At the time, I remember thinking, "This could be fun."
I had absolutely no idea that one little jar would turn into a ritual I haven't stopped since. And at this point, I honestly can't imagine not having a loaf of sourdough bread on the counter at all times.
Sourdough Starter
There's something incredibly satisfying about feeding a sourdough starter, watching it bubble and rise, knowing it’s eventually going to turn into a fresh loaf of bread.
For this recipe, I feed my starter at a 1:2:2 ratio. One part starter, two parts warm water, and two parts bread flour. I start with 30 grams of starter in the jar and mix in 60 grams of water and 60 grams of bread flour.
The night before I plan to mix the dough, I feed my starter and leave it at room temperature overnight. By morning, it should have noticeably risen and look bubbly and active. I like to use it right at its peak, when it has reached its highest point and is full of air bubbles.
Just make sure you have at least 100 grams of active starter for the recipe, plus a little left behind to keep your starter going.
Jalapeño Cheddar Sourdough Bread Ingredients
- Active sourdough starter
- Water
- Bread flour
- Whole wheat flour
- Maldon sea salt flakes
- Cheddar cheese, thick-cut shredded
- Fresh jalapeños, de-seeded and sliced
- Rice flour, for dusting (optional)
Tips for the Best Jalapeño Cheddar Sourdough Bread
A few things I’ve learned after making this loaf more times than I can count:
- Start with a happy starter. I always make sure my starter is nice and bubbly before I begin. An active starter really is the foundation of a great loaf, so this is one step you don't want to rush.
- De-seed the jalapeños. This is completely a personal preference, but I love getting all that fresh jalapeño flavor without making the bread overly spicy. If you like a little more heat, leave some of the seeds in!
- Let it get dark. Don’t be afraid of a deeply golden loaf. I actually prefer mine on the darker side because the crust develops so much more flavor and gets beautifully crisp. I’ve also found that a well-baked crust gives the loaf more structure and makes it easier to slice.
- Wait to slice it. I know, it’s hard. As tempting as it is to cut into a loaf fresh out of the oven, letting it cool completely is worth the wait. The crumb continues to set as it cools, which helps keep those beautiful air pockets intact. Cutting too soon can compress the crumb inside and leave you with a gummy texture.
I have to admit, I’m notorious for cutting into it too soon every now and then.
My Favorite Sourdough Tools
You definitely don't need a fancy sourdough setup to make a beautiful loaf, but I have found a few tools that make the process easier.
Banneton basket: A proofing basket helps support the dough and hold its shape during the final rise.
Bench scraper: Makes working with sticky dough and shaping your loaf much easier (and it's great for cleaning up the counter afterward).
Bread bowl covers: One of my favorite little conveniences. They stretch right over the bowl and make it easy to cover and uncover the dough throughout the process. Though plastic wrap or a clean kitchen towel works just fine.
Bread lame or very sharp knife: Makes it easy to score the loaf right before it goes into the oven, giving the bread room to expand as it bakes.
Danish dough whisk: I love this for bringing the dough together in the beginning. It mixes everything quickly without nearly as much dough sticking to it.
Dutch oven with lid: This is what gives you that beautiful artisan crust. The enclosed Dutch oven traps steam while the bread bakes, helping the loaf rise and develop a crisp, golden crust.
Kitchen scale: One of the tools I recommend most. Weighing your ingredients takes the guesswork out of sourdough and helps give you consistent results from loaf to loaf.
Silicone bread sling: Makes it much easier to safely lower the dough into and lift the baked loaf out of a hot Dutch oven. If you don't have one, parchment paper works just as well.
Jalapeño Cheddar Sourdough Bread Timeline
The process of making a sourdough loaf takes a couple of days from start to finish, but most of that time is completely hands-off.
Is this the most technical sourdough schedule? Probably not. But I’ve figured out how to make sourdough fit into my day instead of planning my day around sourdough.
I feed my starter the night before, get most of the hands-on work done the next morning, let the dough do its thing while I work, then shape it that evening and pop it in the fridge overnight.
Night 1: Feed Your Starter
The night before I plan to make the dough, I feed my sourdough starter so it has plenty of time to rise overnight. By morning, it should be active, bubbly, and right around its peak. A strong, active starter is one of the biggest keys to getting a good rise.
Morning: Mix the Dough
In a large mixing bowl, combine the active sourdough starter and water. Stir until the starter is mostly incorporated into the water.
Add the bread flour, whole wheat flour, and Maldon sea salt flakes. Mix until everything is well combined and no dry pockets of flour remain.
The dough will look rough and shaggy at first. Gently work it together in the bowl until the flour is fully hydrated and the dough comes together. Cover the bowl and let the dough rest for about 45 minutes before beginning the stretch and folds.
Morning to Early Afternoon: Stretch & Folds
I do four rounds of stretch and folds, usually about 45 minutes apart. You’ll often see recipes say to do them every 30 minutes, but I’ve found that closer to 45 has worked better for this dough.
I set a timer, but I don’t stress if I’m a little early or late. Life happens, and thankfully sourdough is pretty forgiving. I just cover the bowl between each round and let the dough rest.
On the third round, I add the shredded cheddar and sliced jalapeños, then fold the dough around them. By the fourth and final round, everything starts working its way into the dough and becoming more evenly distributed.
Afternoon: Bulk Fermentation
After the final stretch and fold, I cover the bowl and let the dough rise for the rest of my workday. This is when I leave it alone and let it do its thing.
Rather than watching the clock too closely, I pay more attention to the dough. By the end of bulk fermentation, it should have noticeably increased in size and look lighter, puffier, and more aerated than when you started.
Evening: Bench Rest & Shaping
Around the time I'm cleaning up after dinner, I gently turn the dough onto a lightly floured countertop and let it bench rest for about 30 minutes.
A bench rest is exactly what it sounds like - letting the dough sit on the counter and rest before you shape it. This gives the dough a chance to relax, which makes it much easier to work with and shape.
While the dough rests, I dust my banneton basket with rice flour to keep the dough from sticking.
Once rested, I shape the dough into a tight ball, gently creating surface tension across the top. This helps the loaf hold its shape and encourages a beautiful oven spring as it bakes.
I then place the shaped dough seam-side up into the prepared banneton.
Overnight Proof
Once the dough is in the banneton, I cover it with a disposable bread bowl cover and place it in the refrigerator overnight. I usually let mine cold proof in the fridge for somewhere between 12–16 hours. The extra time helps develop that signature sourdough flavor, and as an added bonus, cold dough is much easier to score the next morning.
Bake the Jalapeño Cheddar Sourdough Bread
The next morning, I preheat the oven to 500°F with the Dutch oven inside for about 30 minutes. Preheating the Dutch oven along with the oven gets it nice and hot before the dough goes in, which helps create that beautiful oven spring and crisp crust.
Safety first! The Dutch oven, including the lid, will be extremely hot. Always use oven mitts anytime you're handling either one.
Once the Dutch oven is hot, I turn the cold dough onto a silicone bread sling or piece of parchment paper and score the top. I carefully lower it into the Dutch oven, cover it with the lid, and return it to the oven. I immediately lower the temperature to 450°F and bake for 25 minutes covered.
After 25 minutes, I remove the lid and bake for another 18 minutes, or until the crust reaches that deep golden color I love. If your loaf is getting darker than you'd like, you can leave the lid on a little longer and remove it closer to the end of the baking time.

Serving the Sourdough
This bread is incredible toasted until the edges are nice and crisp, then topped with a generous smear of salted butter (I strongly recommend Kerrygold) or any of your favorite toppings.
I recently gifted a loaf to a friend, and we turned it into the ultimate grilled cheese with a haul of specialty cheeses and ingredients from Trader Joe's. It might have ruined regular grilled cheese for me.
Jalapeño Cheddar Sourdough Bread FAQs
Is this Jalapeño Cheddar Sourdough Bread spicy?
No, I wouldn't consider this bread spicy. Removing the seeds keeps the heat fairly mild, and the jalapeños mellow as they bake. If you prefer more heat, leave some of the seeds in.
Can I bake this sourdough the same day, or does it need to cold proof overnight?
You can bake it the same day, but I prefer an overnight cold proof. The extra time in the refrigerator helps develop the flavor and makes the dough firmer and easier to score. If you're short on time, you can skip the overnight refrigeration. In this case, after shaping, place the dough in a banneton dusted with rice flour and let it finish proofing at room temperature before baking.
How do I know when bulk fermentation is finished?
Sourdough is less about watching the clock and more about watching the dough. The timing can vary depending on the temperature of your kitchen, how active your starter is, and even the temperature of the dough itself. Look for visual cues along the way. The dough should become lighter, puffier, and more aerated as it ferments. This is also why I don't stress too much about exact timing throughout the process. Use the times in this recipe as a guide, but let your dough tell you when it's ready.
What is the best knife for slicing sourdough bread?
A long, sharp serrated bread knife is the best choice. It cuts through the crust cleanly without crushing the soft, chewy crumb.
How do I store Jalapeño Cheddar Sourdough Bread?
For the best texture, let the loaf cool completely before storing it. I keep mine at room temperature in a bread bag or wrapped in a clean kitchen towel for 2–3 days. Avoid sealing it tightly in plastic or tossing it into a gallon-sized Ziploc bag, especially while it’s still warm. Trapped moisture can quickly soften that beautiful, crisp crust.
For longer storage, I recommend slicing the loaf and freezing it. That way, you can pull out a slice or two whenever you want and pop them straight into the toaster. I actually prefer freezing sourdough over refrigerating it, since refrigeration can make bread go stale faster.
Why is my sourdough dough sticky?
Some stickiness is completely normal, especially when you first mix the dough. As you work through the stretch and folds, it should gradually develop more strength and become easier to handle. I wouldn't immediately add extra flour just because the dough feels sticky in the beginning.
More Bread Recipes
If you can’t live without having bread with every meal like me, there’s plenty more where this came from. Whether you’re craving something savory, sweet, or a classic loaf, browse more of my bread recipes and find your next one to bake.
New England Style Rolls (hot dog buns)
Sweet Potato Rolls with Honey Mustard Glaze

Tag @bingeworthybites on Instagram and hashtag it! #bingeworthybites
Jalapeño Cheddar Sourdough Bread
Equipment
Ingredients
- 100 grams active sourdough starter at peak
- 375 grams water room temperature or warm
- 50 grams whole wheat flour
- 450 grams bread flour
- 12 grams maldon sea salt flakes
- 2 fresh jalapeños de-seeded and sliced
- 1 cup cheddar cheese thick-shredded
- rice flour for dusting (optional)
Instructions
Day 1: Feed the Starter
- The night before you plan to mix the dough, feed your sourdough starter so it has time to rise overnight. I use a 1:2:2 ratio, for example, 30 grams starter, 60 grams water, and 60 grams bread flour. Cover and leave at room temperature overnight.
Day 2: Mix, Ferment & Shape
- The next morning, check that your starter has noticeably risen and is bubbly and active. For best results, use it at or near its peak.
- Add the active sourdough starter and room temperature (or slightly warmed) water to a large mixing bowl and stir to combine.
- Add in the bread flour, whole wheat flour, and sea salt flakes. Mix until fully incorporated and a shaggy but rounded dough ball forms. Cover and rest for about 45 minutes.
- Perform the first stretch and fold by gently pulling one side of the dough upward and folding it over itself. Rotate the bowl and repeat around all four sides. Cover and rest for about 45 minutes.
- Perform a second round of stretch and folds. Cover and rest for another 45 minutes.
- During the third stretch and fold, add the sliced, de-seeded jalapeños and thick-shredded cheddar cheese, gently working the inclusions into the dough. Cover and rest for about 45 minutes.
- Perform a fourth and final round of stretch and folds, using this round to help distribute the jalapeños and cheddar evenly throughout the dough.
- Cover the bowl and allow the dough to bulk ferment at room temperature for the remainder of the day. The dough should noticeably increase in size and look lighter, puffier, and more aerated.
- That evening, gently turn the dough onto a lightly floured work surface and allow it to bench rest for about 30 minutes.
- Shape the dough into a tight ball, gently creating surface tension across the top of the loaf.
- Generously dust a banneton basket with rice flour and place the shaped dough into the basket seam-side up.
- Cover the banneton and refrigerate overnight to cold proof for approximately 12–16 hours.
- Day 3: Bake
- The next morning, place the Dutch oven and lid inside the oven and preheat to 500°F for approximately 30 minutes.
- Remove the dough from the refrigerator and gently turn it out onto a silicone bread sling or sheet of parchment paper. Score the top of the loaf with a bread lame or very sharp knife.
- Carefully remove the preheated Dutch oven from the oven. Using the silicone bread sling or parchment paper, gently lower the dough into the Dutch oven and cover with the lid.
- Return the covered Dutch oven to the oven and immediately reduce the temperature to 450°F. Bake covered for 25 minutes, allowing the oven temperature to gradually come down from 500°F.
- Carefully remove the lid with oven mitts and continue baking uncovered at 450°F for another 18 minutes, or until the crust reaches your desired deep golden-brown color.
- Carefully remove the bread from the Dutch oven and transfer it to a cooling rack. Allow the loaf to cool completely before slicing so the crumb has time to fully set.


Leave a Reply